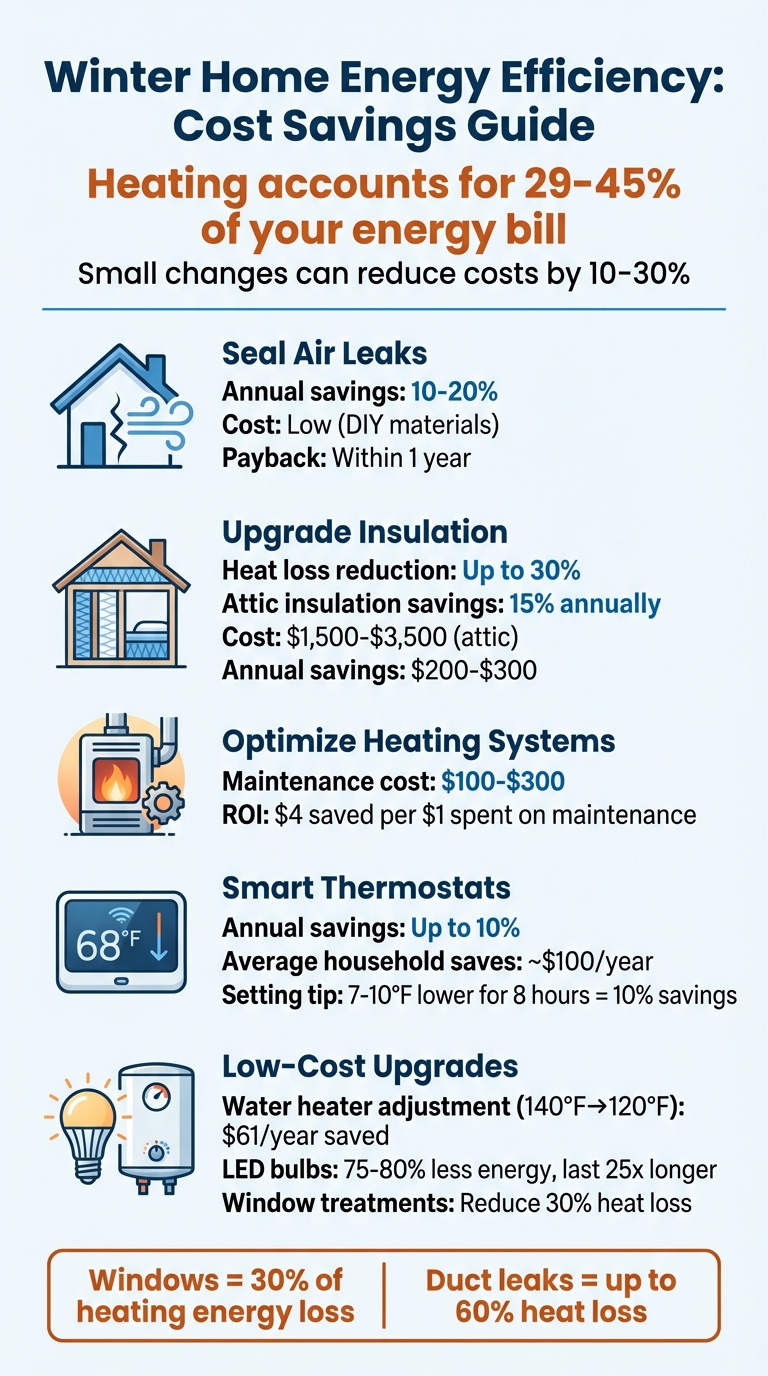
Heating your home during winter can account for 29% to 45% of your energy bill. But here’s the good news: small changes can reduce heat loss and lower costs by 10% to 30%. This guide breaks down simple, actionable tips to improve your home’s energy efficiency, from sealing air leaks to upgrading insulation and maintaining your heating system.
Key Tips to Reduce Energy Costs:
- Seal Air Leaks: Use weatherstripping and caulk to block drafts around windows, doors, and utility cut-throughs. Savings: 10%–20% annually.
- Upgrade Insulation: Focus on attics, basements, and crawl spaces to reduce heat loss by up to 30%.
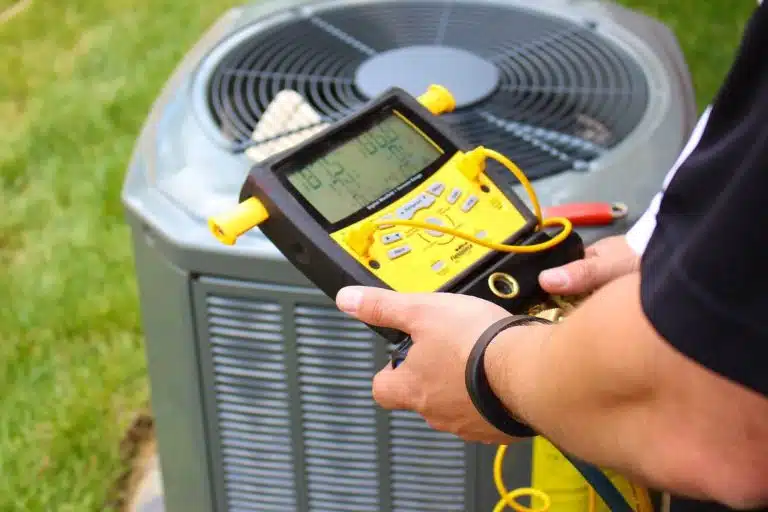
- Optimize Heating Systems: Replace furnace filters regularly and schedule professional maintenance to improve efficiency.
- Smart Thermostats: Save up to 10% annually by automating temperature adjustments.
- Low-Cost Habits: Lower water heater settings to 120°F, insulate pipes, and use thermal-lined curtains to retain heat.
Even minor adjustments, like sealing gaps or adjusting your thermostat, can make your home warmer and save you money. Start with these steps to enjoy a cozier, more cost-effective winter.
Winter Home Energy Efficiency: Cost Savings by Improvement Type
How to save on heat and energy costs this winter
sbb-itb-8db64ac
Seal Air Leaks and Tighten Your Home’s Envelope
Air leaks are a major source of energy loss during winter, and addressing them can significantly lower your heating bills. In fact, reducing drafts can trim annual energy costs by 10% to 20%, with most fixes paying for themselves within a year. The key? Identify where your home is losing heat and seal those gaps using weatherstripping and caulk.
Find Common Draft Points
Drafts can sneak in through both obvious and hidden spots. Some of the most common problem areas include electrical outlets, switch plates, baseboards, attic hatches, fireplace dampers, and window frames. Don’t forget to check outside your home too – look where siding meets chimneys, around outdoor faucets, and along foundation joints.
But the biggest offenders are often harder to spot. According to the Federal Energy Management Program, "The worst culprits are usually not windows and doors, but utility cut-throughs for pipes (‘plumbing penetrations’), gaps around chimneys and recessed lights in insulated ceilings, and unfinished spaces behind cupboards and closets". Dirty streaks on ceiling paint or insulation can also reveal where air is escaping.
To track down leaks, try a few simple tests. Slide a dollar bill between seals to check for gaps, wave a lit incense stick near potential leak points to watch for disturbed smoke, or use a damp hand to feel for cold drafts.
Apply Weatherstripping and Caulking
Once you’ve pinpointed the problem areas, it’s time to seal them up. Use caulk for fixed gaps like those around window frames and baseboards, while weatherstripping works best for moving parts like doors and operable windows.
Before applying materials, clean the surfaces with soap and water to remove grime and old adhesive. Measure the gaps carefully, and cut weatherstripping slightly longer than needed for a tight fit. Here are some common options:
- V-strips: Ideal for window sides and door edges.
- Foam tape: Great for irregular cracks.
- Tubular rubber or vinyl: Best for high-traffic areas like door bottoms.
Don’t forget to install door sweeps so they touch the threshold without dragging. Even small fixes can make a big difference. For example, placing foam gaskets behind outlet and switch plates on exterior walls can block hidden drafts. Keep your fireplace damper tightly closed when not in use, and for areas around chimneys or gas water heater vents, use fire-resistant furnace cement caulk.
When to Call a Professional
While many air leaks can be tackled with DIY methods, some situations require expert attention. Homes with fuel-burning appliances – such as those using natural gas, oil, propane, or wood – should have ventilation checked by a professional before sealing tightly. Poor airflow can lead to "backdrafting", where dangerous carbon monoxide is pulled back into your living space. Warning signs include soot near burners or smoke in utility rooms.
Professionals use tools like blower door tests and infrared cameras to uncover leaks you might miss. Surprisingly, the total air loss from hidden cracks in a home can equal leaving a window open year-round. An energy auditor can help prioritize upgrades, especially for tricky areas like attic floors, wall cavities, and gaps around recessed lighting.
| Situation | Recommended Action |
|---|---|
| Persistent drafts despite DIY efforts | Hire an energy auditor for a blower door test |
| Drafts near gas furnaces or water heaters | Call a professional to check for backdrafting |
| Cold spots on walls with no visible cracks | Schedule a thermographic (infrared) inspection |
| Gaps around chimneys or furnace vents | Use a professional to seal with fire-resistant materials |
| Uninsulated wall cavities | Hire an insulation contractor to blow in cellulose |
Once your home is properly sealed, the next step is to improve insulation to further minimize heat loss.
Improve Insulation and Thermal Barriers
After sealing air leaks, the next logical step is upgrading your insulation. This can lead to a noticeable reduction in heating and cooling costs – by as much as 30%. For instance, improving attic insulation alone can save homeowners up to 15% annually. In colder, damp climates, it’s equally important to choose materials that manage moisture effectively while increasing the R-value of your insulation. This sets the foundation for making your home even more energy-efficient.
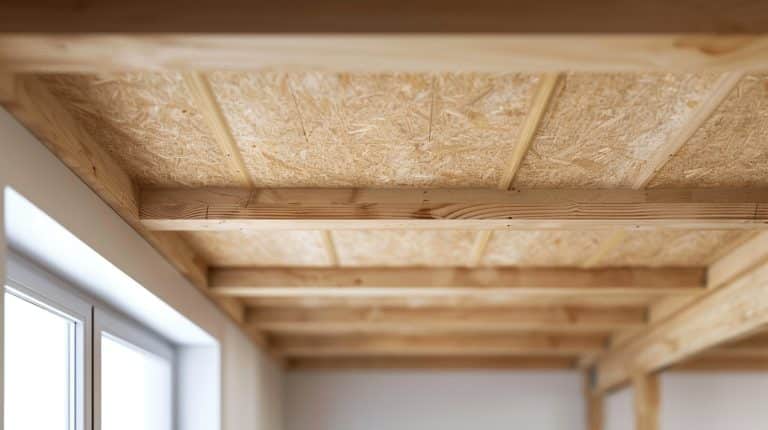
Inspect and Upgrade Attic Insulation
Start by taking a close look at your attic insulation. If it’s level with or below the floor joists, it’s time to add more. Measuring the depth will help you estimate the current R-value, with most insulation types – such as fiberglass, cellulose, and mineral wool – offering an R-value of about 3 to 3.5 per inch.
Before adding new insulation, check for bare spots, damp or compressed material, and gaps around plumbing stacks, chimneys, and recessed lights. These areas are common culprits for heat loss. If you’re unsure how to seal these gaps, refer to earlier sections for detailed tips. Also, if you come across insulation that might contain hazardous materials, it’s best to call in a professional.
For DIY enthusiasts, blown-in cellulose or fiberglass batts are excellent options for attic floors. However, homes built before the 1930s with knob-and-tube wiring require an electrician’s input before adding insulation. On average, upgrading attic insulation costs between $1,500 and $3,500, with annual savings ranging from $200 to $300.
Improve Crawl Space and Basement Performance
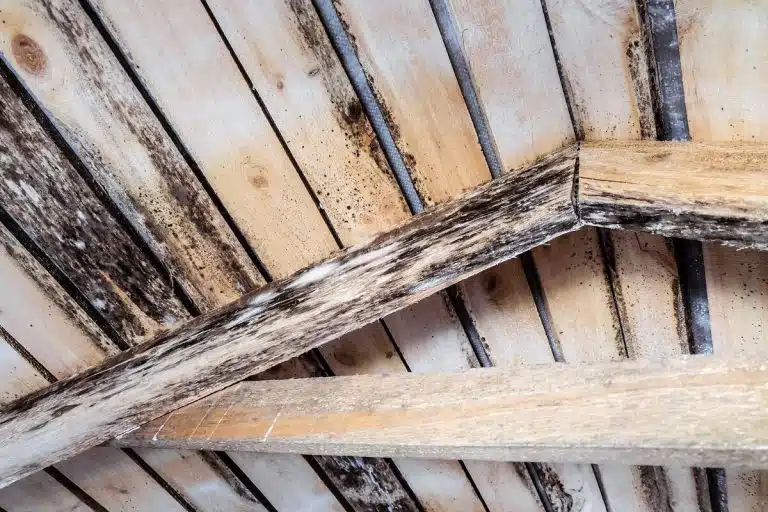
Crawl spaces and basements are often overlooked sources of heat loss and moisture issues. Properly insulating your basement alone can save up to 11% on heating costs. Start by inspecting these spaces for exposed soil or damaged vapor barriers, as moisture from the ground can harm insulation and encourage mold growth.
During wet months, remove foam blocks obstructing crawl space vents to reduce moisture buildup. Seal rim joists where the foundation meets the floor framing to stop drafts, and opt for closed-cell spray foam. This material not only insulates but also acts as a moisture barrier, making it especially useful in humid climates.
"Spray foam insulation can reduce energy consumption by up to 50% compared to traditional insulation methods." – United Seattle
To block ground moisture, install a polyethylene ground cover on the crawl space floor. Be on the lookout for musty odors, mold on wooden surfaces, or pooled water – these are clear signs of moisture problems that need immediate attention. Basement insulation projects typically cost between $1,500 and $2,500, with annual savings of $150 to $200.
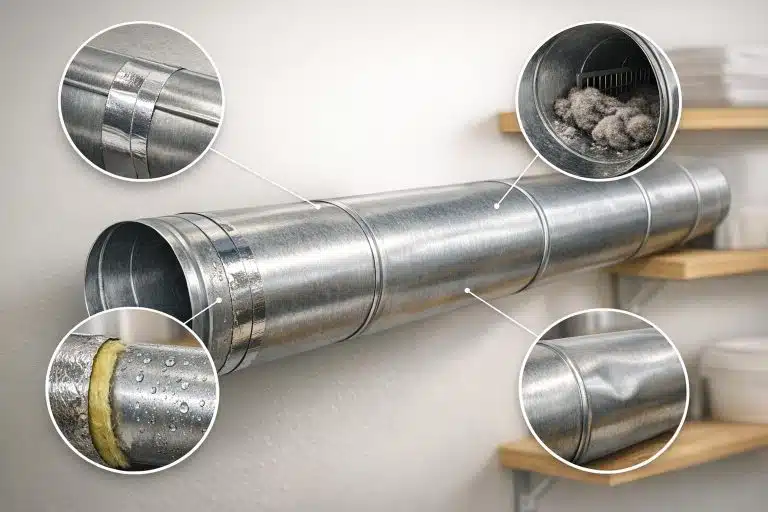
Insulate Pipes and Ducts
Exposed pipes and ducts in unconditioned spaces are major energy wasters and can freeze during cold weather. In fact, leaky or uninsulated ducts in attics and crawl spaces can cause up to 60% heat loss before the air even reaches your registers. To tackle this, wrap hot water pipes with foam sleeves and seal duct joints using mastic or metal-backed tape. Focus on areas in attics, crawl spaces, and garages. DIY materials for this task generally cost between $50 and $200.
For a more comprehensive solution, professional duct sealing and insulation services range from $200 to $1,000, depending on the system’s complexity.
| Insulation Type | Best Suited For | Skill Level |
|---|---|---|
| Blanket (Batts/Rolls) | Unfinished walls, crawl spaces, floors, ceilings | Basic |
| Foam/Rigid Board | Exterior walls, foundations, continuous insulation | Intermediate |
| Loose-fill/Blown-in | Attic floors, enclosed walls, hard-to-reach areas | Intermediate |
| Sprayed Foam | Wall cavities, attic ceilings, enclosed spaces | Advanced |
Once your insulation is upgraded, the next step is fine-tuning your heating system for even better efficiency and comfort.
Optimize Your Heating System
Now that your insulation is in top shape, it’s time to focus on your heating system. Even small tweaks can make a big difference in energy efficiency and comfort during those chilly months. Regular maintenance and smart upgrades not only prevent energy waste but also help keep your home cozy when it matters most.
Replace or Clean Furnace Filters
Did you know that a dirty furnace filter can make your system work harder and waste energy? According to Energy Star, "A dirty filter will slow down air flow and make the system work harder to keep you warm or cool – wasting energy". That’s why it’s crucial to inspect your filters each month during the winter and replace them every three months – or even more often if you have pets or a large household.
When shopping for a replacement, check the filter’s MERV rating (Minimum Efficiency Reporting Value). Higher ratings capture smaller particles, but make sure your system can handle them without restricting airflow. Replacing the filter is simple: turn off the power, locate the slot where the return duct meets the furnace, slide out the old filter, and insert the new one with the arrows pointing toward the furnace.
Once your filters are clean, consider scheduling annual HVAC maintenance to keep your heating system running smoothly.
Schedule Professional HVAC Maintenance
Annual HVAC maintenance is a must, preferably in the fall before temperatures drop. A professional tune-up, which typically costs between $100 and $300, can save you money in the long run – every dollar spent on maintenance can save about $4 in repairs. Travis Baugh, Digital Brand Marketing Manager at Carrier, emphasizes:
"Furnace maintenance is crucial to keeping your heating system running efficiently. It helps identify potential issues early, preventing costly repairs or unexpected breakdowns".
During a maintenance visit, technicians handle tasks like cleaning the blower assembly, inspecting the heat exchanger for cracks, adjusting burner combustion, checking for gas leaks, and testing safety controls. Keep an eye out for warning signs between visits, such as uneven heating, weak airflow, rising energy bills, or a yellow pilot light (it should be blue).
For added convenience, companies like Envirosmart Solution offer annual service packages. The FURNACE CARE™ plan costs $199 and includes heat exchanger cleaning, burner checks, and emergency response. Their SMART GOLD™ package, priced at $699, combines furnace care with air duct cleaning, dryer vent service, and attic inspections, plus a 20% discount on additional services. With your system professionally maintained, you can take it a step further by integrating smart technology.
Upgrade to Smart Thermostats
Smart thermostats are a game-changer for energy savings and comfort. These devices learn your schedule and automatically adjust the temperature, potentially cutting annual heating bills by up to 10%. Some advanced models even use external sensors to monitor room-specific temperatures, ensuring the areas you use most stay comfortable.
For example, setting your thermostat back by 7 to 10°F for at least 8 hours daily can reduce heating costs by about 10% annually. ENERGY STAR-certified smart thermostats can save the average household around $100 a year. A good starting point is to set your thermostat to 68°F when you’re home and awake, and lower it to 60–65°F when you’re asleep or out.
Placement matters, too. Install your thermostat on an interior wall, away from direct sunlight, drafts, kitchens, or windows, to avoid inaccurate readings. If you’re using satellite sensors, place them in high-traffic areas but steer clear of spots that are unusually hot or cold, as those could cause unnecessary adjustments.
Adopt Energy-Saving Habits and Low-Cost Upgrades
After completing major system upgrades like sealing, insulation, and HVAC improvements, it’s time to focus on the smaller, everyday changes that can make a difference. These simple habits and affordable upgrades can help trim your energy bills and keep your home cozy throughout the winter months.
Adjust Water Heater Settings
Your water heater works nonstop, and small tweaks can lead to noticeable savings. Lowering the temperature to 120°F not only reduces energy consumption but also helps prevent accidental burns. For instance, dropping the setting from 140°F to 120°F could save you about $61 per year. To further cut costs, wrap the water heater tank with an insulating blanket – this upgrade often pays for itself within a year. Don’t forget to insulate any exposed hot water pipes with foam sleeves, which start at roughly $1.50 for every 6 feet, to minimize heat loss.
Use Window Treatments Strategically
Windows are notorious for heat loss, accounting for up to 30% of a home’s heating energy loss during winter. To combat this, take advantage of sunny days by opening curtains on south-facing windows to let in natural warmth. At night, close the curtains to help retain that heat indoors. For an extra layer of insulation, consider upgrading to thermal-lined drapes or applying clear plastic film to drafty windows. These small adjustments can make a big difference in keeping your home warm and your heating system efficient.
Maximize Appliance Efficiency
Simple changes in how you use appliances can also add up. Only run dishwashers and washing machines with full loads, and skip energy-hungry settings like heated drying. Swapping out old incandescent light bulbs for LEDs – which use 75% to 80% less energy and last up to 25 times longer – is another effective way to lower electricity usage. Standby power, often called “phantom energy,” can account for nearly 25% of household energy use, so unplug chargers or use power strips to cut it off completely. Even something as small as turning off your computer monitor when stepping away for more than 20 minutes can contribute to savings. Together, these simple habits ensure your home improvements deliver maximum energy efficiency all winter long.
Conclusion: Take Action for a More Energy-Efficient Winter
Start with simple, effective steps to cut energy costs this winter. Adjusting your thermostat by 7–10 degrees for just 8 hours a day could trim your heating bill by up to 10% annually. Sealing air leaks around doors and windows can yield similar savings. These quick fixes are easy to implement and set the stage for even greater efficiency.
For more in-depth improvements, professional services can make a big difference. Properly sealing and insulating ductwork can enhance heating efficiency by as much as 20%. Comprehensive energy audits, including blower door tests, can uncover hidden leaks that DIY efforts might overlook. Even small leaks, when added together, can cause significant heat loss.
To make these upgrades more accessible, Envirosmart Solution offers a range of advanced services designed for long-term savings. Their SMART GOLD ™ package, priced at $699 annually, covers furnace maintenance, air duct cleaning, attic inspections, and more, with the added bonus of a 20% discount on extra services. They also assist homeowners in taking advantage of rebates and incentives, making energy-efficient upgrades more budget-friendly.
The financial benefits are substantial. For example, replacing outdated heating equipment with ENERGY STAR-certified models can lower annual energy bills by nearly $140. Beyond cost savings, these upgrades enhance comfort by addressing drafts and cold spots.
Every step counts. Whether you spend $50 on weatherstripping or invest in a professional energy audit, each action brings you closer to a cozier, more energy-efficient home. Take the first step today.
FAQs
How can I find and fix hidden air leaks in my home during winter?
To find those pesky hidden air leaks in your home, start with a good old-fashioned visual check. Focus on areas where leaks are most likely: window and door frames, electrical outlets, baseboards, gaps around pipes or vents, and the weather-stripping on doors or attic hatches. On a breezy day – or with a fan running – see if you can feel drafts in these spots. Want a more precise method? Use a lit incense stick or a smoke pencil. If the smoke flickers or gets pulled away, you’ve probably found a leak.
For a deeper dive, give a DIY pressurization test a shot. Here’s how: close all windows, doors, and fireplaces, then turn on an exhaust fan to create negative pressure inside your home. Repeat the smoke test to spot leaks more easily. If you’re after pinpoint accuracy, though, a professional blower-door test is your best bet. This specialized test can uncover even the tiniest air leaks. Once you’ve identified the trouble spots, seal them up with caulk, weather-stripping, or insulation to make your home cozier and more energy-efficient.
How can upgrading to a smart thermostat improve energy efficiency in winter?
Upgrading to a smart thermostat is a game-changer for managing energy efficiency during the colder months. These devices adjust your home’s temperature automatically, tailoring it to your schedule and preferences. The result? Less energy waste and a consistently comfortable home – no more fiddling with the settings every few hours.
Beyond convenience, smart thermostats offer detailed insights into your energy usage. This data empowers you to make smarter choices and cut down on heating costs. Some models even adapt to your routines over time, fine-tuning their performance to keep your home cozy while saving you money.
When should I hire a professional for insulation upgrades?
If your insulation project goes beyond straightforward, visible areas or you’re unsure about meeting safety and building codes, hiring a professional can be a smart move. This is especially true if a home energy audit uncovers hidden gaps, inadequate insulation, or moisture problems that demand expert solutions.
Some materials and spaces also require specialized knowledge. Take spray foam insulation, for instance – closed-cell foam, in particular, needs a trained installer to ensure proper application and ventilation. Similarly, insulating tricky spots like attics or crawl spaces often involves safety concerns and intricate sealing work that professionals are better equipped to handle.
Here are a few situations where calling in a pro makes sense:
- An energy audit identifies major air leaks or insufficient insulation.
- You plan to use materials like spray foam that require specific expertise.
- The job involves hard-to-reach spaces, such as attics or crawl spaces.
- You lack the tools, know-how, or confidence to tackle the project safely and effectively.
Hiring a professional not only ensures the job is done correctly but also helps you get the most out of your insulation – keeping your home cozy and energy-efficient during those colder months.