Is your home struggling to retain heat, or do you notice that your cooling costs are gradually on the rise? This could be a sign that your attic insulation is deteriorating and no longer performing as it should. Worn-out insulation can also indicate the presence of nasty, unwanted elements such as mold.
If this is the case, your comfort and air quality could be severely compromised. The best solution is to rip out the old insulation and have new insulation installed.
Removing insulation from the attic can be a challenge, but with the right equipment and basic DIY skills, this is a project that can be managed by almost anyone. Through this short guide, we will walk you through the essential steps of attic insulation removal, allowing you to get to grips with the job yourself.
Before we cover how to remove insulation from the attic in basic steps, let’s take a quick look at the essentials needed to do so properly and responsibly.
Key Points
- Essential Safety Gear: Wear gloves, goggles, and respirators to protect against irritants and harmful particles.
- Right Tools for the Job: Equip yourself with vacuums, rakes, dustpans, and sturdy waste bags for efficient removal.
- Understand Insulation Type: Identify whether you’re dealing with blown-in cellulose or fiberglass batts.
- Professional Services Recommended: For safety and efficiency, consider hiring experts for insulation removal, especially for large or complex projects.
- Time Investment: Removal duration depends on the attic’s size and the insulation material, taking anywhere from a few hours to a full day.
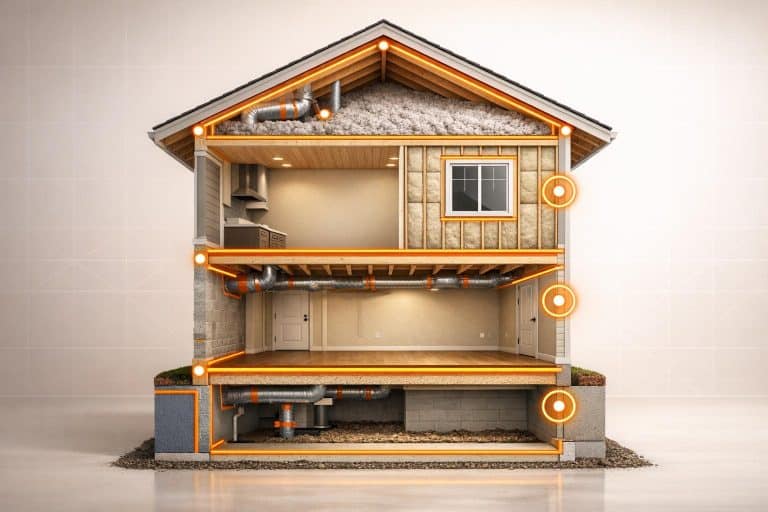
Essentials for Attic Insulation Removal
We certainly wouldn’t describe attic insulation removal as a dangerous project, but diligence toward safety should always be exercised with this kind of thing. To ensure you can handle this task safely, you should think about gearing up appropriately.
Start with good quality gloves that will protect your hands from sharp objects and irritants; rubber-coated gloves are ideal for this kind of work. You’ll also need a high-quality respirator (at least an N95, as an absolute minimum) to guard against inhaling dust, fibers, or potential mold spores.
Eye protection is also worth considering, so grab some decent safety goggles complete with an anti-fog coating to maintain good visibility. Full-body coveralls are recommended to keep your skin protected from direct contact with insulation and other irritants that will exist.
Further Essentials
Hard hats are a commonly overlooked piece of equipment, but many people have fallen victim to low clearance and exposed nails. It happens far more frequently than you might imagine, so stay safe and wear one at all times.
A good light source is also a prerequisite: headlamps are perfect as they keep your hands free to work safely in those dimly lit conditions. You will also need a ladder of some description, industrial-sized waste bags, a vacuum with a HEPA filter, dustpans, rakes, and plenty of tape.
Floor and wall coverings are always a good idea if you want a more professional approach to attic insulation removal.
Determine the Insulation Type
Before you remove insulation from the attic, you must figure out what type of insulation you are working with. In the vast majority of cases, you will be faced with either fiberglass or blown-in insulation.
Blown-in cellulose insulation is typically brown and gray-looking material that will crumble to the touch. By the same token, fiberglass batt insulation comes in thicker, longer pieces.
We mentioned that you will need a vacuum but in truth, an industrial-grade insulation removal vacuum is the optimal equipment for fiberglass, owing to the tiny particles of glass. Our vacuums here at Envirosmart Solutions, for example, are powered by a gas engine and come complete with vacuum hoses, metal hose connectors, and large vacuum bags. If you can acquire something to that standard, a better job is far more likely.

How to Remove Insulation From an Attic
Equipped with the right tools and information, removing attic insulation can be quite straightforward. However, the steps differ slightly depending on which type of material you are dealing with.
We have covered a basic step-by-step guide on removing blown-in insulation, below. If you need to remove fiberglass bat insulation, skip forward to the next section.
How to Remove Blown Insulation
- Preparation: Position your equipment near the garage to easily access it throughout the process.
- Protection Setup: Clear a path from the attic entry to the front door. Cover this path with protective sheets to catch any falling debris.
- Equipment Ready: In the attic, set up a sturdy ladder, a commercial vacuum or a HEPA-filtered shop vac, a rake, and a dustpan.
- Suit Up: Don protective gear, and start the vacuum to begin extracting the insulation.
- Raking and Bagging: Use the rake to gather loose insulation into the dustpan, then transfer it into waste bags.
- Detailing with Shop-Vac: After the bulk is removed, use a Shop-Vac to clear out any remaining particles.
- Routine Breaks: Take a short break every 15-20 minutes to prevent exhaustion.
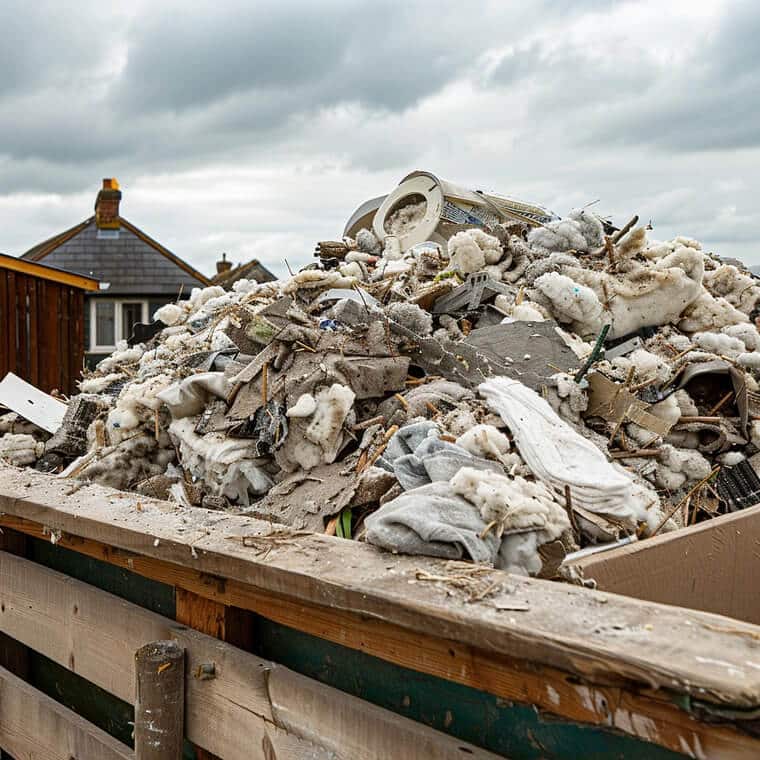
- Disposal: Securely tie off the waste bags and dispose of them in a designated dumpster.
- Cleanup: After removing all insulation, take down the equipment and clean the protective coverings. Remove your gear in an isolated area to avoid spreading any contaminants into living spaces.
By following these steps to the latter, you can remove insulation from the attic without too much hassle, ready for a fresh new material to be fitted. Next, we shall take a look at how to remove attic insulation if you are dealing with fiberglass insulation.
How to Remove Fiberglass Insulation
- Safety First: Suit up in protective gear, including gloves, goggles, and a dust mask to prevent irritation from fiberglass particles.
- Prepare the Area: Find the edges of the batts and carefully slice them into sections with a utility knife or scissors for easier handling.
- Remove Insulation: Gently pull the sections of insulation from their placements and bag them promptly in thick plastic bags for disposal.
- Disposal: Ensure all removed insulation is taken to an appropriate disposal facility to avoid any fire hazards.
- Clean Up: Vacuum and wipe down all attic surfaces to remove any lingering fibers or debris and ensure a clean space for new insulation.
- Seek Help if Needed: If the task is overwhelming or if the attic is extensive, consider hiring insulation professionals to ensure the removal is handled efficiently and safely.
How to Remove Old Insulation From an Attic
In the vast majority of cases, attic insulation consists of either blown-in or fiberglass material. In very rare instances, vermiculite or asbestos insulation may have been installed. In these cases, we strongly suggest you reach out to a specialist insulation removal company to have your insulation professionally removed.
How Much Does It Cost, and How Long Does It Take?
Removing attic insulation can take anywhere from 5 to 24 hours, depending on the size of the attic and the insulation type. To get a better idea, you can contact Envirosmart Solutions for a quote. We will inspect your attic, provide you with an accurate price, and let you know how long it should take to remove the insulation from your attic.
In terms of averages, the cost to remove insulation from a 1,500-square-foot attic ranges from $1,000 to $3,000, depending on a whole host of factors that can not be determined until an inspection has been completed.
Bottom Line
While the steps covered here may seem quite straightforward, actually performing the task is another matter entirely. Removing attic insulation isn’t advisable for total DIY beginners due to several risks involved, such as dealing with pest contamination and unsafe material.
However, hiring a professional from the Envirosmart Solutions insulation removal team will ensure that your insulation is handled safely, quickly, and without causing damage to your property.
Reach out today for expert insulation removal assistance and enjoy the comfort of knowing your home is in great hands with Envirosmart Solutions!