Your crawl space might be out of sight, but ignoring it can lead to serious issues like mold growth. Mold thrives in damp, poorly ventilated areas, and crawl spaces often provide the perfect conditions. Left unchecked, mold can weaken your home’s structure, damage materials like wood and insulation, and even harm your health by spreading spores into your living areas.
Key Steps to Prevent Mold:
- Control Moisture: Fix leaks, improve drainage, and insulate pipes to prevent condensation.
- Install a Vapor Barrier: Use thick polyethylene sheeting to block ground moisture.
- Regulate Humidity: Keep levels below 50% with a dehumidifier or sealed vents.
- Improve Insulation: Seal gaps and use rigid foam insulation to reduce condensation.
- Regular Inspections: Check for signs of mold, moisture, or structural damage twice a year.
Taking these steps not only protects your home but also improves air quality and reduces energy costs. For added peace of mind, consider professional maintenance plans like Envirosmart Solution‘s annual inspection service.

5 Essential Steps to Prevent Mold Growth in Crawl Spaces
Why Mold Grows in Crawl Spaces
What Causes Mold Growth
Mold thrives when it has access to three key ingredients: moisture, a food source, and the right temperature. Unfortunately, crawl spaces often provide all three.
Moisture is the biggest culprit. It can come from soil evaporation, condensation on cold surfaces, or even small plumbing leaks. When humidity levels climb above 50–60%, mold growth can accelerate quickly.
Materials commonly found in crawl spaces, like wood, insulation, and organic debris, serve as food for mold. Wood floor joists, subflooring, and paper-faced insulation are especially vulnerable. When the moisture content in wood surpasses 20%, it creates the perfect environment for mold to take hold.
Temperature and ventilation also play a major role. Mold thrives in temperatures between 40°F and 100°F, which are typical in many crawl spaces. Poor ventilation can trap moisture, and open vents may even bring in more humid air instead of drying the space. Understanding these factors is key to identifying mold problems early.
How to Spot Mold in Your Crawl Space
A musty smell is often the first sign of mold. This odor tends to be noticeable near floor vents or on the first floor of your home, where the stack effect pulls air upward.
Visually, mold can appear as black speckles, white fuzzy patches, or discoloration on wood, insulation, or walls. It often hides in less obvious places, like behind fiberglass insulation batts. Be on the lookout for standing water, condensation, or peeling paint on lower walls – these are red flags.
Health symptoms can also be a warning sign. Persistent coughing, wheezing, eye irritation, or skin rashes that improve when you leave the house might indicate mold spores are affecting your indoor air quality. Bethany Uribe, an AHERA-certified building inspector, notes that mold’s impact on health often goes beyond what you can see.
Structural changes in your home can signal deeper problems. Warped, sagging, or "bouncy" floors, as well as soft spots in wood, could mean mold or rot-inducing fungi are damaging your home’s structure. If you suspect mold, you can test the area by applying a 1:10 bleach solution – if the spot lightens, mold may be present.
sbb-itb-8db64ac
4 Secrets to Transform a Moldy Crawl Space into a Watertight Haven!
How to Prevent Mold Growth in Crawl Spaces
To keep mold at bay in crawl spaces, you need to manage moisture, block ground vapor, and control humidity effectively. The first step is to address any sources of moisture.
Remove Moisture Sources
Moisture is the main culprit behind crawl space mold. Start by inspecting for common issues like plumbing leaks, cracks in the foundation, and condensation on HVAC ducts. Make sure gutters and downspouts direct water at least 5–6 feet away from the foundation. Also, grade the soil around your home to slope away at a 5% incline over a 10-foot distance to prevent water pooling near the foundation.
If you live in an area with frequent flooding or high groundwater levels, a sump pump in a buried basin can help remove standing water. In humid conditions, insulate cold water pipes to stop condensation from dripping onto wooden beams or joists. Regularly check the relative humidity in the space – if it exceeds 60%, take action immediately.
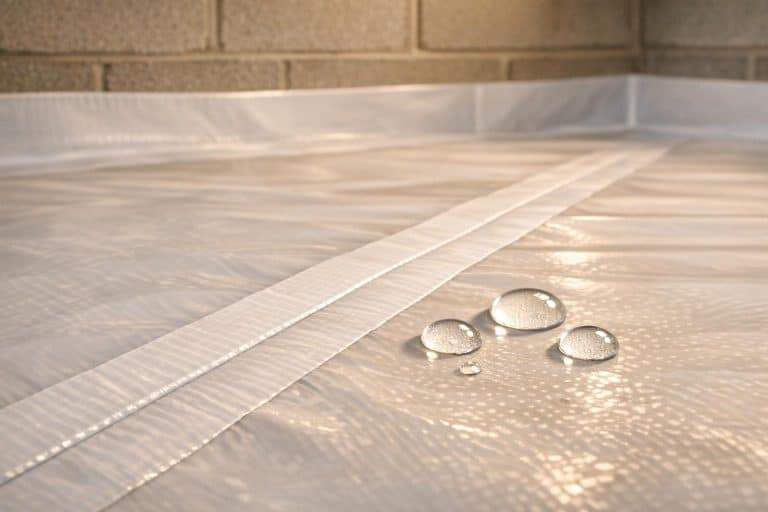
Install a Vapor Barrier
Once you’ve addressed the sources of moisture, the next step is to block ground vapor with a vapor barrier. This polyethylene sheeting slows down moisture evaporation, making it easier for dehumidifiers and ventilation to keep the air dry. Choose a barrier that’s 6‑mil to 20‑mil thick and cover 100% of the exposed soil. Thicker materials offer better performance. Michael Church, founder of Crawl Space Ninja, emphasizes:
"A puncture‑resistant, single‑layer vapor barrier is the best type".
When installing the barrier, overlap the sheets by 12 inches, seal the seams with waterproof tape, and extend the sheeting 6 inches up the foundation walls, securing it with rubberized butyl tape. To keep the barrier in place, use landscape fabric stakes to pin it to the ground. While a vapor barrier doesn’t completely block moisture, it significantly reduces evaporation, allowing dehumidifiers to work more effectively.
Improve Airflow and Control Humidity
Keeping the relative humidity below 50% is essential to prevent mold. In humid climates, traditional outdoor venting can sometimes make things worse by bringing in additional moisture. In such cases, sealing vents and using mechanical dehumidification is a better option. For encapsulated crawl spaces, a standalone dehumidifier specifically designed for these areas is highly recommended. As Allison A. Bailes III, PhD, from Energy Vanguard, explains:
"If you want dry air in your crawlspace, a dehumidifier is the way to go".
If your crawl space includes ductwork, you can add a small HVAC supply vent at a rate of 1 cubic foot per minute for every 50 square feet of floor area. For unconditioned spaces, consider installing a continuously operating exhaust fan to circulate and remove moist air. Finally, make sure dryer vents and exhaust fans release air outside the home – not into the crawl space.
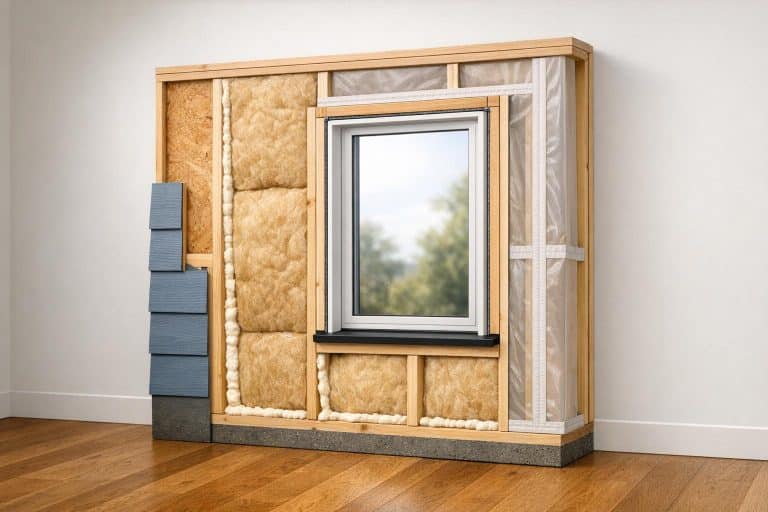
Insulation and Sealing Methods
Once you’ve tackled moisture control, the next step in mold prevention is ensuring your insulation and sealing are up to par. These elements work hand-in-hand with moisture control to provide an added layer of protection. Insulation helps keep surfaces above the dew point, which reduces condensation, while sealing blocks air leaks that can carry moisture into your home. As Energy.gov points out:
"Air movement accounts for more than 98% of all water vapor movement in building cavities."
This makes sealing air leaks a top priority. When warm, humid air seeps through cracks and meets cold surfaces, like rim joists or pipes, it condenses. This creates the perfect environment for mold to form, often within just 24 to 48 hours. By addressing insulation and sealing, you can significantly reduce this risk.
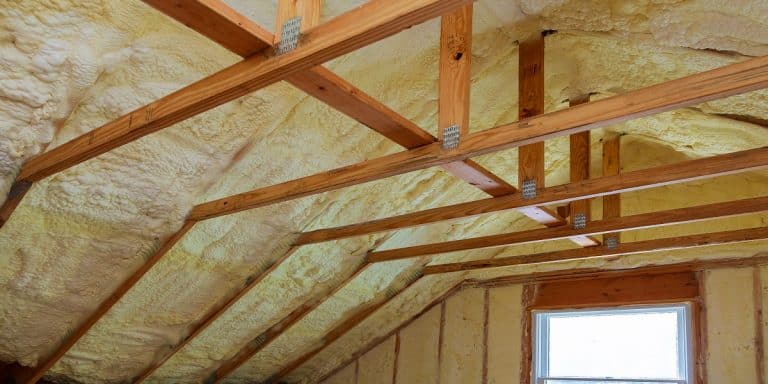
Insulate Walls, Floors, and Pipes
Start by insulating crawl space walls with rigid foam boards rather than fiberglass batts. Rigid foam options like polyisocyanurate deliver excellent performance with R-values of R-6.0 to R-6.5 per inch, while extruded polystyrene offers about R-5.0 per inch. Before applying the foam, lay a 6-mil polyethylene vapor barrier on the floor and walls. Then, attach the rigid foam directly to the foundation walls. Pay close attention to the rim joist area, where the foundation meets the floor framing. Cut rigid foam to fit snugly between each joist bay, and seal the edges with spray foam or caulk to eliminate air leaks.
Don’t forget to insulate cold water pipes with foam sleeves. This prevents summer condensation and protects against freezing in winter. Additionally, insulate the crawl space access door by attaching rigid foam to its interior and adding weather stripping around the frame for an airtight seal. Leave a 3-inch bare strip at the top of the foundation wall above the insulation. This strip, known as a "pest control inspection strip", allows for termite inspections without having to remove insulation.
Seal Gaps and HVAC Ducts
Sealing gaps, vents, and penetrations is crucial for keeping moisture out. Use materials like rigid foam, spray foam, or caulk to seal all openings. If your crawl space is unvented, permanently close off foundation vents by filling them with rigid foam blocks and sealing with spray foam. To prevent moisture from wicking, install a sill gasket or a rubberized roofing membrane between the foundation wall and the sill plate.
Pay particular attention to HVAC ductwork. Leaks in ducts can circulate moisture and mold spores throughout your home. Inspect all ductwork carefully and seal any leaks with mastic to ensure they’re airtight. If you have a dryer located in or near your crawl space, confirm that its vent exhausts completely to the outside.
For those considering professional help, crawl space encapsulation and sealing services typically range from $8,000 to $20,000. While this may seem like a significant investment, it can lower your annual energy costs by up to 18% and greatly reduce the likelihood of mold growth. These steps, combined with earlier moisture control measures, create a comprehensive defense against mold.
Regular Inspections and Professional Maintenance
It’s a good idea to inspect your crawl space twice a year – once in the spring and again in the fall. These regular checkups can help you spot early signs of moisture problems or mold, reinforcing the moisture control and insulation efforts you’ve already put in place.
When inspecting, keep an eye out for telltale signs of trouble. Look for discolored patches – black, green, white, or brown – that have a fuzzy or slimy texture on wood or insulation. Pay attention to soft spots in floor joists, warped or sagging floors, and cracks in the foundation. A digital thermo-hygrometer can help you monitor humidity levels, which should stay between 30% and 50%, while a moisture meter can confirm that joists remain below 20% moisture content.
Don’t overlook hidden areas, like behind insulation, where mold might be growing out of sight. Also, check for signs of pests, as rodents and termites thrive in damp, organic environments. Keep in mind that mice can squeeze through openings as small as 1/4 inch to access your crawl space.
Envirosmart Solution’s CRAWL SPACE & ATTIC CARE™ Plan
While DIY inspections are helpful, professional maintenance can provide an added layer of protection for your crawl space. For homeowners who prefer a structured approach without the hassle of regular DIY checks, Envirosmart Solution offers their CRAWL SPACE & ATTIC CARE™ Plan. Priced at $199 annually, this plan includes a thorough professional inspection.
The plan covers checks for sagging or missing insulation – often a sign of moisture issues – along with inspections for air gaps around pipes and HVAC ducts, and rodent activity that could compromise vapor barriers and structural components. Members also benefit from a 15% discount on mold remediation services, a valuable perk considering that mold removal can cost anywhere from $500 to over $6,000 depending on the severity of the problem.
With trained technicians on the job, early signs of deterioration are more likely to be caught before they escalate into costly repairs, giving you peace of mind and long-term protection for your home.
Conclusion
Controlling moisture is the key to keeping mold out of your crawl space. To prevent mold, focus on managing moisture levels: install a durable vapor barrier, maintain humidity between 30–50%, and seal any gaps that could let in humid air. Since air movement drives over 98% of water vapor movement in building cavities, sealing your crawl space is just as critical as using a dehumidifier.
Don’t forget about exterior drainage – grade the soil properly, clean out gutters, and ensure water flows away from your home. Inside, support these efforts with wet crawl space repair, insulation, and regular inspections. Together, these steps work hand-in-hand with vapor barriers and sealing techniques to keep your crawl space dry. For added peace of mind, professional maintenance can provide an extra layer of protection.
If you’d rather skip the DIY route, Envirosmart Solution’s CRAWL SPACE & ATTIC CARE™ Plan offers annual inspections for $199, plus a 15% discount on remediation services. Their trained technicians monitor vapor barriers, insulation, and humidity levels, catching potential problems early before they turn into expensive repairs.
Encapsulating your crawl space doesn’t just prevent mold – it can also cut your energy bills by up to 18% annually while improving your home’s air quality. Since air from the crawl space rises into your living areas through HVAC systems and floor gaps, keeping this space dry and sealed protects your family’s health.
Whether you tackle it yourself or hire professionals, taking action now can save you from costly repairs later. A dry crawl space means better air quality, lower energy bills, and a healthier home overall.
FAQs
What are the best ways to prevent moisture buildup in a crawl space?
To keep moisture in your crawl space under control, begin by laying down a vapor barrier over the entire dirt floor. This will act as a shield against moisture rising from the ground. Next, seal off any vents, cracks, or gaps to stop outside air and humidity from sneaking in. Make sure water is directed away from your foundation by improving exterior drainage and fixing any leaks you find. For long-term moisture management, consider using a dehumidifier to keep humidity levels below 65%. These measures can help safeguard your crawl space and enhance the air quality in your home.
How can I check if my crawl space is properly insulated to prevent mold?
To check if your crawl space is properly insulated against mold, start by examining the insulation and assessing the overall environment. Make sure there’s a continuous, airtight barrier along the walls and rim joists. Proper insulation should cover these areas completely, leaving no gaps, with all seams securely sealed. You’ll also want to ensure the vapor barrier – usually a polyethylene sheet – is intact, overlaps the insulation, and is free of any tears.
Next, look for any signs of moisture, such as damp spots, condensation, or musty smells. Using a handheld infrared thermometer, check that the insulated surfaces maintain a temperature close to your indoor range (about 68–72°F). Additionally, use a digital hygrometer to measure the relative humidity. If the humidity regularly exceeds 65%, you might need to improve sealing, invest in a dehumidifier, or address possible drainage issues.
When the insulation is thorough, there’s no visible moisture, and the humidity levels are well-managed, your crawl space is likely in good shape and less susceptible to mold.
What are the warning signs of mold in a crawl space?
Mold in a crawl space often makes its presence known through a persistent musty or damp odor that doesn’t go away, even when the area isn’t being used. You might also spot visible mold growth or discoloration on surfaces like wood, insulation, or the vapor barrier. These patches are typically black, green, or white. Other red flags include water stains, standing water, damp soil, or condensation forming on metal or concrete.
If the humidity level in your crawl space climbs above 65%, it creates an environment where mold is more likely to thrive. Beyond physical signs, mold can also affect your health. If anyone in your household is dealing with unexplained symptoms like sneezing, coughing, itchy eyes, or worsening asthma, it could be a sign that mold spores are spreading from the crawl space into your home.
Tackling these issues promptly is key. Drying out the crawl space, improving ventilation, and sealing any air leaks can help stop mold in its tracks and safeguard your home’s air quality.