Want to save on energy bills and make your home more comfortable? Air sealing is the key.
Air sealing blocks drafts and air leaks in your home, working alongside insulation to improve energy efficiency. Insulation slows heat transfer, but without sealing gaps and cracks, air can bypass it, reducing its effectiveness. Here’s what you need to know:
- Energy Savings: Air sealing and insulation together can cut heating and cooling costs by up to 15%.
- Moisture Control: Sealing gaps prevents humid air from entering, reducing mold and structural damage risks.
- Improved Comfort: Eliminates drafts, keeps temperatures consistent, and reduces cold spots.
- Healthier Indoor Air: Blocks allergens, pollutants, and pests from entering your home.
Key areas to seal include attics, crawl spaces, rim joists, windows, and doors. Simple fixes like caulking and weatherstripping often pay for themselves in under a year. For a complete solution, consider professional services that use tools like blower door tests to locate hidden leaks.
If you’re in the Pacific Northwest, addressing air leaks is especially important due to the damp climate. Proper air sealing ensures your insulation performs at its best, saving money and protecting your home.
Insulation Installation Guide: Proper Air Sealing to Maximize Insulation
sbb-itb-8db64ac
How Air Sealing Works with Insulation
Insulation and air sealing work hand in hand to improve your home’s energy efficiency. While insulation slows down heat transfer – much like a down jacket keeps you warm – air sealing stops drafts, acting like a windbreaker. Without air sealing, even the best insulation loses its effectiveness, just as a jacket won’t keep you warm if cold wind blows through it.
"Air sealing alone doesn’t eliminate the need for proper insulation to reduce heat flow through the building envelope." – Department of Energy
Together, these two systems create what experts call a "complete thermal barrier". Insulation reduces heat flow through walls, ceilings, and floors, but it can’t stop air from moving in and out of your home. Air leaks allow conditioned air to escape and outside air to enter, bypassing the insulation and reducing its performance. Here’s how sealing those gaps can prevent heat loss, moisture problems, and high energy bills.
Stopping Air Leaks and Heat Loss
Sealing air leaks reinforces insulation’s ability to maintain energy efficiency. Air leaks move heat through convection – when warm air escapes through unsealed gaps in winter or hot air enters during summer, it reduces how well your insulation works. Essentially, moving air carries heat away faster than insulation can resist.
One way to identify air leaks is by checking for "dirty spots" on fiberglass insulation. These marks indicate areas where air is bypassing the insulation, wasting energy.
In areas like attics and crawl spaces, gaps around pipes, electrical wiring, and rim joists are common sources of drafts. Sealing these areas – whether before or during insulation installation – helps maintain the insulation’s thermal resistance and prevents heat loss caused by air movement.
Preventing Moisture and Mold Problems
Air leaks don’t just let heat escape – they can also carry moisture into your home. Warm, humid air can condense when it contacts cold surfaces, leading to damp insulation, mold growth, and even wood rot, which can weaken your home’s structure.
By sealing gaps, you block humid air from reaching cold surfaces. When surfaces stay above the dew point, condensation can’t form, protecting both your insulation and the wooden framing underneath. This is especially crucial in damp climates like the Pacific Northwest, where controlling moisture is key.
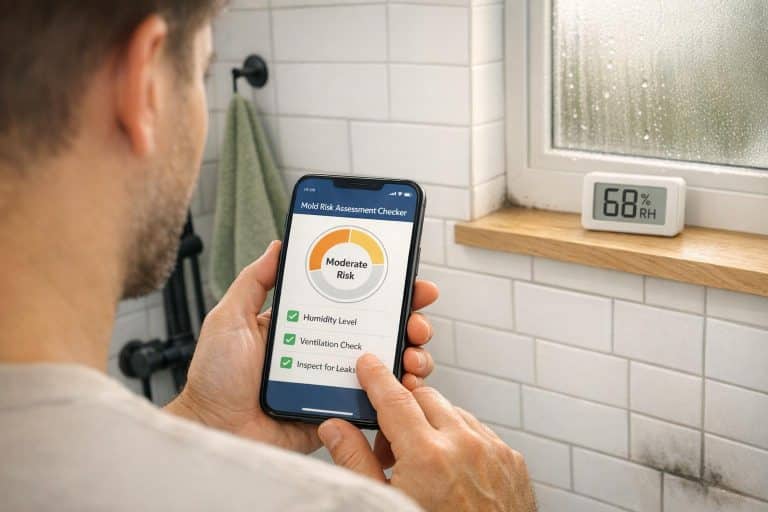
The U.S. EPA suggests keeping indoor relative humidity between 30% and 50% to reduce the risk of mold. Proper air sealing helps by limiting the entry of moisture-laden outdoor air and preventing conditioned indoor air from escaping into wall cavities, where it might condense. Crawl spaces are particularly important to address – up to 50% of the air in your home can originate from below. Sealing these areas helps keep moisture out and improves overall air quality.
Cutting Energy Bills and Improving Comfort
Air sealing does more than just enhance insulation – it saves money and boosts comfort. Combining air sealing with insulation can cut heating and cooling costs by up to 15%. Think of air leaks as being equivalent to leaving a window open every day – they can undo the benefits of insulation.
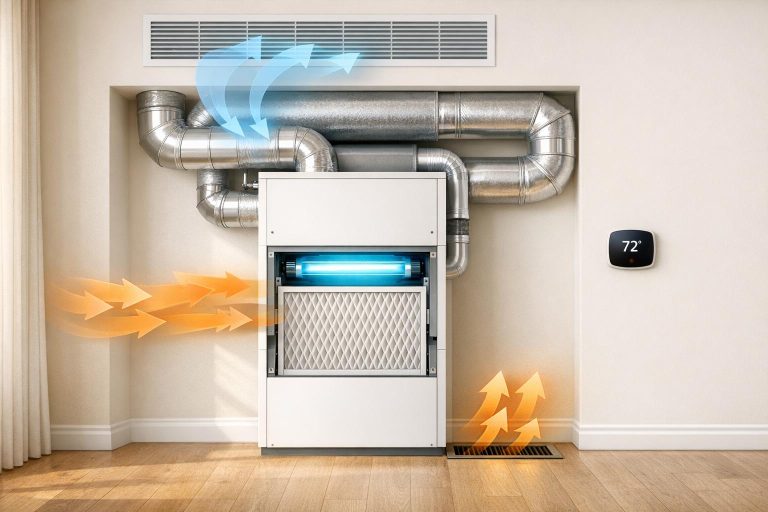
By eliminating drafts, air sealing reduces how often your HVAC system has to run to maintain a comfortable temperature. This not only saves hundreds of dollars annually on energy bills but also evens out temperature fluctuations, eliminating cold spots near windows and drafty areas along exterior walls.
"A well-sealed envelope, coupled with the right amount of insulation, can make a real difference on your utility bills." – ENERGY STAR
Air sealing also improves indoor air quality by keeping out pollutants, allergens, and even pests. The result? A healthier, more comfortable living space with consistent temperatures throughout your home.
Where to Find and Seal Air Leaks
When it comes to air sealing, the places you might overlook are often the biggest culprits. While windows and doors tend to get all the attention, your attic and basement typically harbor the most significant leaks. These hidden gaps create what’s known as the "chimney effect", where warm air escapes through the attic while cold air is drawn in from below. This constant airflow not only weakens your insulation’s effectiveness but also drives up your energy costs. By identifying and addressing these problem areas, you can maximize your insulation’s efficiency.
Start by looking for clues that point to air leaks. Uneven insulation coverage or discoloration are telltale signs of air movement. Dark streaks on ceilings or carpets near wall joints also indicate airflow. Common problem areas include attic hatches, recessed lights, plumbing vents, wiring holes, rim joists, and utility penetrations. For a thorough assessment, consider hiring a professional energy auditor to perform a blower door test, which can pinpoint hidden leaks.
To seal these gaps, use materials like caulk for small openings and spray foam for larger ones. Caulk is ideal for gaps up to 1/4 inch, while spray foam works for voids up to 3 inches. For durability, choose caulks that remain flexible for at least 20 years, ensuring they won’t crack as your home settles.
Sealing Attic Openings and Penetrations
The attic is a critical starting point for stopping the chimney effect. Focus on sealing areas like the attic hatch, plumbing vent stacks, and recessed light canisters. Wiring holes and spaces behind kneewalls are also common trouble spots.
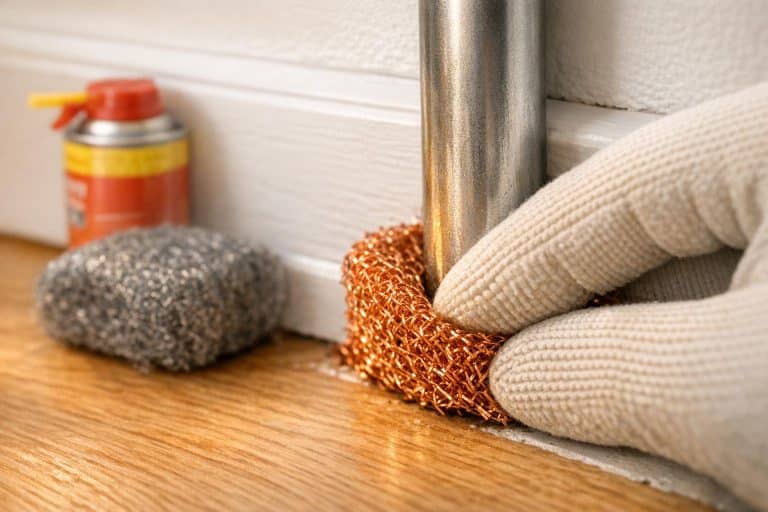
Use caulk or spray foam to seal most attic penetrations, but around chimneys and furnace flues, opt for fire-resistant materials like sheet metal and furnace cement caulk. These are designed to handle high temperatures safely. Avoid using standard spray foam near heat sources, as it poses a fire risk. For the attic hatch itself, apply weatherstripping around its edges to ensure a tight seal when closed.
Once the attic is sealed, shift your attention to other areas with both movable and fixed components.
Sealing Windows, Doors, and Walls
Windows and doors require different sealing methods depending on the part you’re addressing. Weatherstripping is best for movable parts like windows and door sashes, while caulk works for stationary elements like frames and joints. If your door bottoms or thresholds are worn, replace them with versions that include pliable sealing gaskets for better performance.
For walls, install foam gaskets behind outlet and switch plates on exterior walls to reduce drafts. Seal gaps around plumbing, ducting, or electrical wiring where they pass through walls, floors, and ceilings. If you have a fireplace, keep the damper closed when not in use or consider using an inflatable chimney balloon to block air loss through the flue.
After addressing these areas, turn your attention to the lower levels of your home.
Sealing Crawl Spaces and Basements
Basements and crawl spaces are key to stopping drafts and completing the air-sealing process. The rim joist, where the foundation meets the wood framing, is a major source of air leaks and should be a top priority. Seal both the top and bottom of the rim joist cavities, paying special attention to "bump out" sections like bay windows, which are more prone to leakage.
Another critical area is the gap between the wooden sill plate and the concrete foundation, which runs along the perimeter of your home. Seal this gap thoroughly, as well as any utility penetrations where wires, water pipes, drain lines, plumbing vent stacks, or gas lines pass through the basement ceiling or exterior walls. For larger or deeper cracks, use a backer rod before applying caulk to ensure a stronger and more effective seal. Always complete air sealing before adding insulation to prevent air from bypassing it.
"After sealing attic air leaks, complete the job by sealing basement leaks, to stop the chimney effect." – ENERGY STAR
Materials and Tools for Air Sealing
Air Sealing Materials Comparison: Caulk, Spray Foam, and Weatherstripping Guide
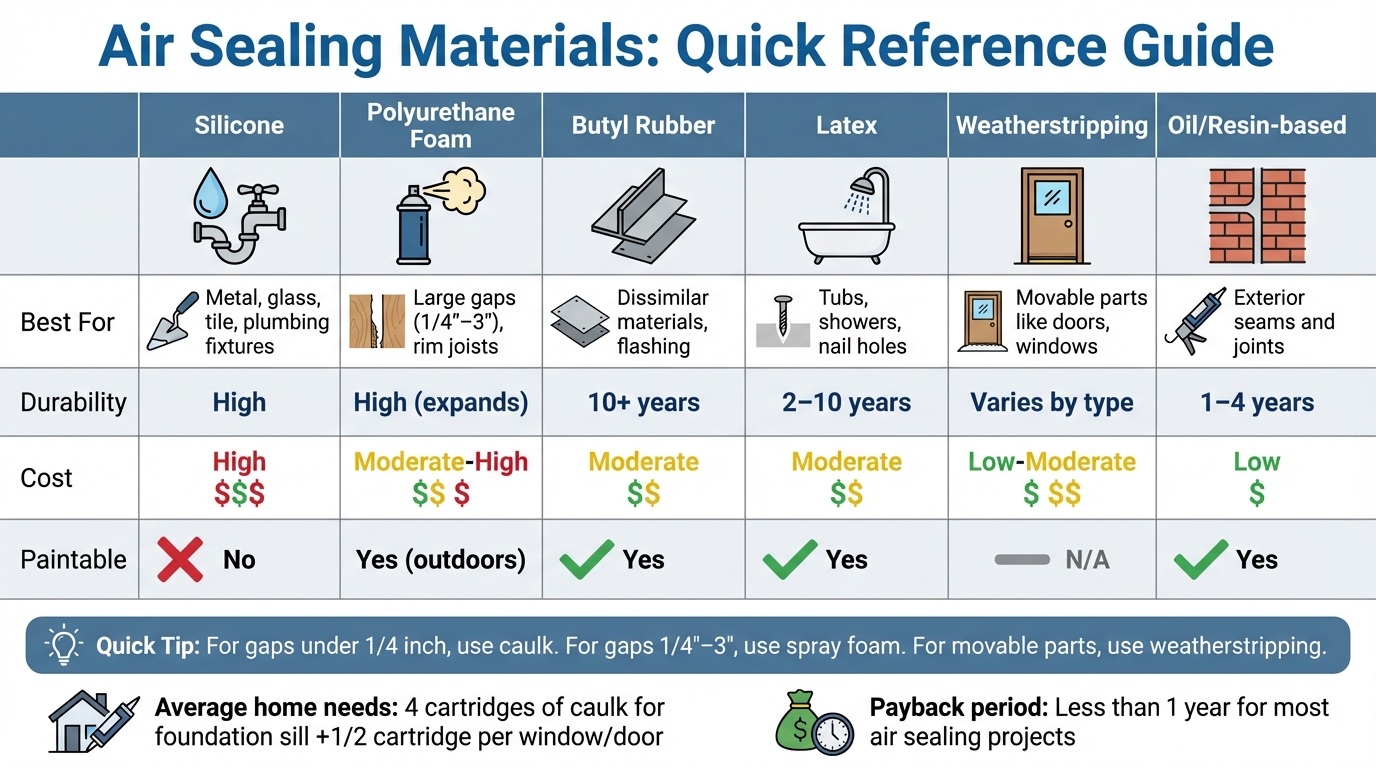
Choosing the right materials and tools is essential for improving your insulation’s effectiveness. The correct materials create a durable seal. For small cracks under 1/4 inch – like those around door frames or baseboards – caulk is ideal. For larger gaps, ranging from 1/4 inch to 3 inches, expandable spray foam is the better option. When dealing with movable components, such as windows and doors, weatherstripping is the practical choice since it blocks drafts while allowing the components to function properly.
Durability and cost vary among materials. Silicone caulk provides excellent flexibility, stretching up to three times its width, but it’s more expensive and cannot be painted. Butyl rubber caulk offers a lifespan of 10 years or more at a moderate cost, while oil or resin-based caulks are cheaper but only last 1–4 years. For an average home, you’ll need about four cartridges of caulk for the foundation sill and half a cartridge per window or door. The payoff? Air sealing methods like caulking and weatherstripping often recoup their costs in under a year.
Caulk, Spray Foam, and Weatherstripping Comparison
| Material | Best For | Durability | Cost | Paintable |
|---|---|---|---|---|
| Silicone | Metal, glass, tile, plumbing fixtures | High | High | No |
| Polyurethane Foam | Large gaps (1/4"–3"), rim joists | High (expands) | Moderate-High | Yes (outdoors) |
| Butyl Rubber | Dissimilar materials, flashing | 10+ years | Moderate | Yes |
| Latex | Tubs, showers, nail holes | 2–10 years | Moderate | Yes |
| Weatherstripping | Movable parts like doors, windows | Varies by type | Low-Moderate | N/A |
| Oil/Resin-based | Exterior seams and joints | 1–4 years | Low | Yes |
Tools Needed for Air Sealing Projects
You won’t need many tools to tackle an air sealing project, but some essentials make all the difference. A half-barrel caulking gun with an automatic release is a great choice – it prevents unwanted oozing and gives you better control. Before applying new caulk, you’ll need a putty knife or stiff brush to scrape away old caulk or paint, ensuring a clean surface for a proper seal.
For spray foam, disposable gloves are a must since the foam is notoriously sticky. A retractable utility knife is useful for cutting weatherstripping to size, and a staple gun helps secure materials around larger gaps. If you’re working in the attic, you’ll also want safety glasses, a dust mask, and a flashlight. When applying caulk, make sure outdoor temperatures are above 45°F and hold the caulking gun at a 45-degree angle to push the material deep into cracks.
Next, we’ll dive into how to test and measure the improvements you’ve achieved.
Testing and Measuring Air Sealing Results
Ensuring your air sealing efforts are effective is key to getting the most out of your insulation. One of the best ways to check this is with a blower door test. This test creates a pressure difference in your home, which helps expose any remaining air leaks around windows, doors, attics, and walls.
Blower Door Testing for Air Leaks
A blower door test measures how airtight your home is, expressed as Air Changes per Hour (ACH). A lower ACH means your home is more energy-efficient. Geoffrey Katz from Green Home Logic highlights the importance of this test:
"The post-installation test confirms that the insulation and sealing work reduced air leakage as expected".
Many professional sealing projects aim to reduce total air infiltration by about 25%. To get the clearest picture of your improvement, it’s recommended to perform the test both before and after completing the sealing work. Post-installation results not only confirm reduced air leakage but also demonstrate your home’s improved energy efficiency. This can be a great selling point if you decide to move. Additionally, better sealing helps keep out pollutants, allergens, and moisture, contributing to healthier indoor air quality.
While blower door tests identify leaks, keeping an eye on your energy usage can further confirm the benefits.
Monitoring Energy Use and Savings
Your utility bills are a direct indicator of how well your air sealing efforts are paying off. Savings can vary depending on your location. For example, homes in colder areas like Climate Zone 7 might see heating and cooling savings of up to 19%, while homes in warmer regions like Climate Zone 1 typically save around 7%.
To track your progress, compare heating and cooling bills for the same months year over year. Beyond lower costs, you’ll likely notice fewer drafts, more consistent indoor temperatures, and an overall boost in comfort. Air sealing methods like caulking and weatherstripping often pay for themselves within a year, so you should start seeing measurable savings on your utility bills fairly quickly.
If you’re looking for professional guidance, Envirosmart Solution offers expert testing and air sealing services to help maximize energy efficiency throughout the Pacific Northwest.
Conclusion
When combined, air sealing and insulation create a powerful thermal barrier that significantly reduces energy loss. Insulation works to slow heat transfer through surfaces, while air sealing blocks air movement through cracks and gaps. Together, these strategies can help homeowners cut heating and cooling costs by an average of 15%. Simple fixes like caulking and weatherstripping often pay for themselves within a year, offering long-term energy savings.
But the benefits go beyond just saving money. Proper sealing improves indoor comfort by eliminating drafts and cold spots, ensuring consistent temperatures, and keeping out dust, pollen, and other outdoor pollutants. Effective moisture control also protects insulation from mold and prevents structural issues caused by humidity. With nearly 90% of homes in the U.S. under-insulated, addressing both air sealing and insulation can make a noticeable difference.
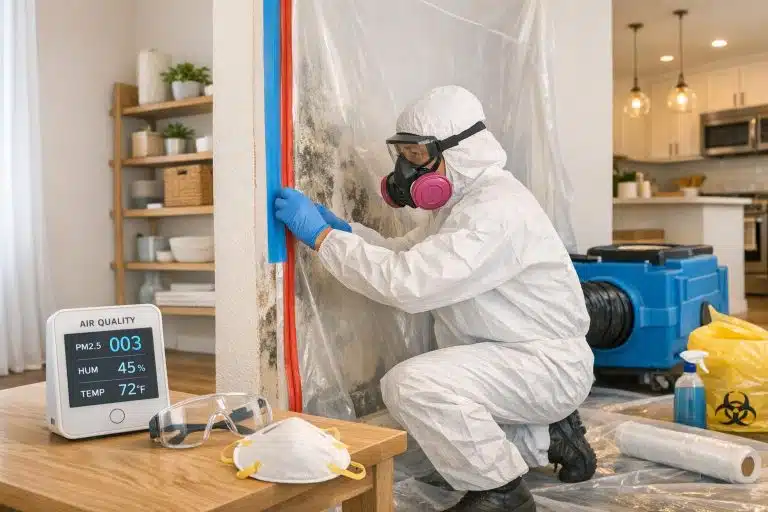
For homeowners in the Pacific Northwest, where seasonal temperature swings and high humidity are common, professional air sealing is particularly valuable. Many leaks – hidden in places like plumbing, lighting, and framing joints – require specialized tools, such as blower door tests and thermal imaging, to locate and seal effectively. The cost of air sealing a 1,000-square-foot home typically ranges from $500 to $1,500, a worthwhile investment that reduces energy use and extends the life of HVAC systems.
To maximize these benefits, expert solutions are key. Envirosmart Solution provides full-service air sealing and insulation throughout the Pacific Northwest. Their offerings include professional diagnostics, installation, and maintenance packages. Whether sealing visible gaps around windows and doors or addressing complex attic and crawl space issues, Envirosmart Solution ensures your home achieves peak efficiency. They also help homeowners access rebates to offset project costs, making it easier to enjoy the full value of your insulation investment.
FAQs
Do I need air sealing before adding insulation?
Air sealing is a crucial step to tackle before installing insulation. By sealing up gaps, cracks, and leaks in your home’s structure, you stop unwanted air from sneaking in or out. This prevents drafts, keeps temperatures consistent, and helps avoid wasting energy.
Here’s why it matters: without air sealing, insulation can’t perform at its best. When air leaks are left unchecked, they undermine the insulation’s ability to regulate your home’s temperature. Sealing these leaks not only boosts insulation efficiency but also makes your living space more comfortable. Plus, it eases the workload on your heating and cooling systems, which can translate to lower energy bills.
In short, air sealing lays the groundwork for insulation to do its job effectively, giving you better temperature control and energy savings.
What are the biggest hidden air leaks in a home?
The biggest hidden air leaks in homes often lurk in the attic and basement. Key trouble spots include areas like behind kneewalls, attic hatches, wiring holes, plumbing vents, open soffits, recessed lighting, furnace flues, and basement rim joists. These gaps can let unconditioned air seep into your home, leading to higher energy bills and less comfortable living spaces.
How do I know if air sealing worked?
You’ll know your air sealing efforts have paid off when you notice fewer drafts, cold spots, or air leaks in your home. According to the Department of Energy, effective sealing not only boosts comfort but also enhances energy efficiency. To ensure the job was done right, consider consulting a certified contractor. They can pinpoint problem areas and verify that the improvements are making a difference.