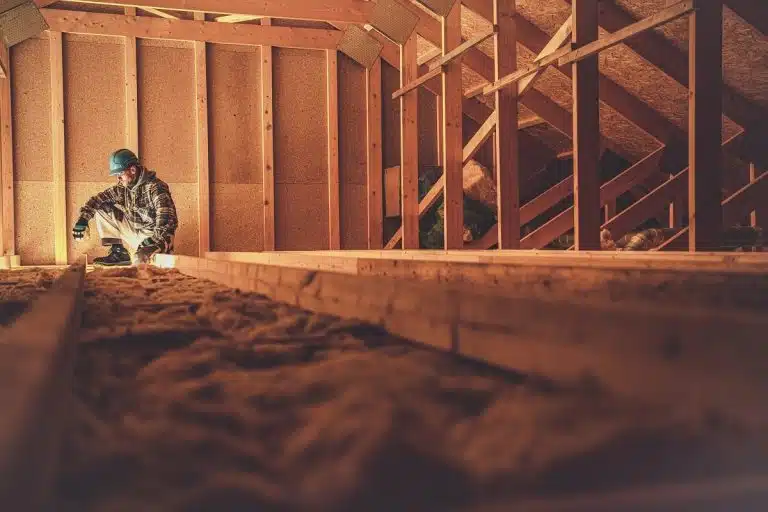
Attic air sealing is one of the most effective ways to improve your home’s energy efficiency and indoor comfort. By closing gaps between your living space and the unconditioned attic, you can reduce energy bills, protect against moisture damage, and improve HVAC performance. Here’s what you need to know:
- Why it matters: Air sealing prevents drafts, reduces uneven room temperatures, and stops harmful air movement (like radon or moisture-laden air) between floors.
- Key benefits: Saves energy, reduces HVAC strain, and prevents mold or wood rot caused by condensation.
- DIY vs. Professional: DIY costs under $100 but requires time and effort. Professionals charge $2,000+ but ensure thorough results.
- Common leak spots: Recessed lights, attic hatches, plumbing stacks, and chimney gaps are major culprits.
- Tools/materials: Silicone caulk, spray foam, rigid foam board, high-temp caulk, and safety gear are essential.
Pro Tip: Always seal air leaks before adding insulation to avoid trapping moisture or making future repairs harder. Regular inspections and blower door tests can help maintain efficiency over time.
How to Air Seal Your Attic BEFORE Insulation | 5 Critical Steps Contractors Miss (Save $$$)
Where Air Leaks Occur in Attics
Knowing where to check for air leaks can save you time and help you address the most pressing issues first. Attics are common culprits for air leakage, with problem spots including framing joints, mechanical penetrations, and access points. These gaps allow conditioned air to escape into the unconditioned attic, wasting energy and potentially leading to moisture issues. According to the U.S. Department of Energy, attics "typically contain extensive holes, cracks, and penetrations", making them prime targets for improving energy efficiency in existing homes.
A quick tip for spotting air leaks: look for dark or "dirty" insulation. When air moves through gaps in the attic floor, the insulation acts like a filter, trapping dust and leaving visible discoloration. Pull back insulation in these areas to uncover hidden gaps, especially around soffits, top plates, and structural elements. From there, focus on the most leak-prone spots.
Recessed Lights, Electrical Boxes, and Wiring
Recessed "can" lights, especially those not rated for insulation contact (IC-rated), often create openings between your living space and the attic. Similarly, electrical boxes and wiring penetrations – like those where wires pass through the top plate – can let air escape and bring attic dust into your home.
For small gaps (around 1/4 inch or less), use silicone or acrylic latex caulk. Gaps between 1/4 inch and 3 inches can be sealed with expanding spray foam. For anything wider than 3 inches, start by filling the space with fiberglass insulation as a backing before applying foam. However, avoid sealing around knob-and-tube wiring (common in homes built before 1930) and only seal or insulate over IC-rated recessed lights.
Plumbing Stacks and Vent Penetrations
Plumbing stacks, furnace flues, and chimney chases are other major areas where air leaks occur. Gaps around these penetrations allow air and moisture to travel freely between your living space and the attic. Building codes require a 1-inch clearance around metal flues and a 2-inch clearance around masonry chimneys to keep insulation and other materials away from combustible surfaces.
Seal small gaps around plumbing stacks with expanding foam or caulk. For larger gaps, use fiberglass insulation as a backing before applying foam. Never use spray foam near hot flues or chimneys; instead, opt for lightweight aluminum flashing combined with high-temperature silicone caulk to create a safe, durable seal. To maintain the required clearance, construct a metal dam around the flue to keep insulation from contacting the hot surface.
Attic Hatches, Doors, and Pull-Down Stairs
Access points like attic hatches, pull-down stairs, and kneewall doors are often the biggest sources of air leaks. These areas typically lack a continuous air barrier, making them a major weak spot in your home’s insulation.
To reduce leaks, add weatherstripping and secure the door with latch bolts for a tight seal. Insulate the top of the hatch with rigid foam board or batt insulation to prevent heat loss. If your attic has loose-fill insulation, install blocking or dams around the access point to keep the insulation in place.
If tackling these issues feels overwhelming, professional help is available. Envirosmart Solution provides expert attic air sealing services tailored to the Pacific Northwest, helping homeowners improve energy efficiency and protect against moisture problems.
Planning Your Attic Air Sealing Project
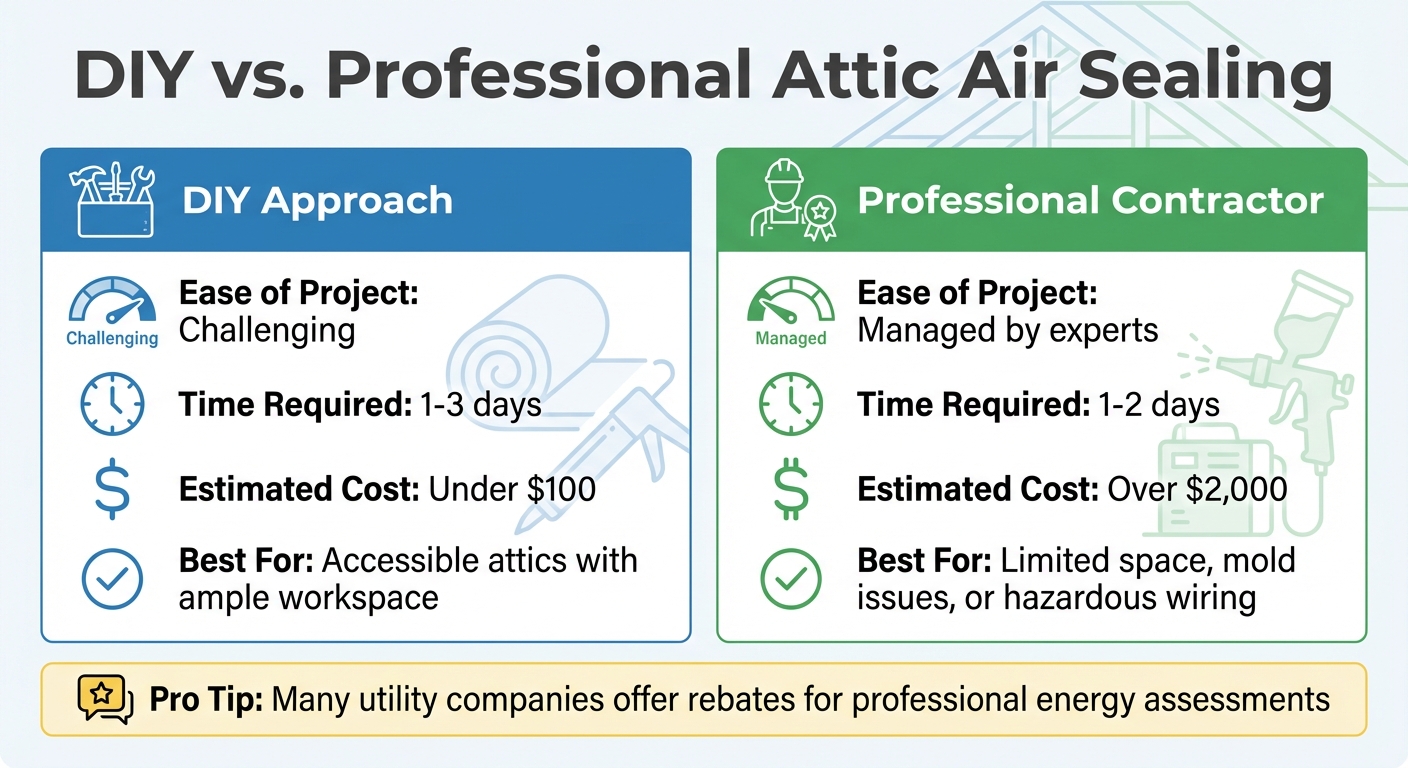
DIY vs Professional Attic Air Sealing: Cost, Time, and Complexity Comparison
Before diving into your attic, take some time to plan your approach. Start by sketching your home’s interior layout to identify potential problem areas. Key spots to note include dropped soffits above kitchen cabinets, slanted ceilings over staircases, and places where interior walls meet the ceiling. This preparation will help you target the right areas once you’re inside the attic.
Safety should always come first. Check for hazards like vermiculite insulation (which may contain asbestos), knob-and-tube wiring (common in homes built before the 1930s), or mold on rafters. If you encounter any of these issues, call in a professional. The U.S. Department of Energy’s Building America Program emphasizes, "Safety must be addressed first by ensuring adequate combustion air is available for gravity-exhausted furnaces and water heaters". If your home uses gas or oil appliances, it’s wise to hire a professional to conduct combustion safety tests both before and after sealing. This ensures you avoid dangerous carbon monoxide back-drafting, setting a solid foundation for deciding whether to take on the project yourself or hire a pro.
DIY vs. Professional Air Sealing
Choosing between a DIY approach and hiring a professional depends on your attic’s condition and your comfort level with tackling a home improvement project.
| Feature | DIY Approach | Professional Contractor |
|---|---|---|
| Ease of Project | Challenging | Managed by experts |
| Time Required | 1–3 days | 1–2 days |
| Estimated Cost | Under $100 | Over $2,000 |
| Best For | Accessible attics with ample workspace | Limited space, mold issues, or hazardous wiring |
Many utility companies offer rebates for professional energy assessments and air sealing services. For example, Envirosmart Solution specializes in attic air sealing in the Pacific Northwest and can guide homeowners in taking advantage of available rebates and incentives for energy efficiency upgrades.
Inspecting Your Attic for Air Leaks
A visual inspection is often all you need to spot air leaks – no expensive tools required. Look for dirty or darkened insulation, a telltale sign that air is moving through gaps and leaving dust behind. In winter, frosty patches may form where warm, moist air escapes and condenses. During warmer months, these areas might show water stains instead.
Start by addressing the larger gaps, such as dropped soffits, attic kneewalls, or spaces where walls meet the attic floor. Pull back insulation to uncover hidden gaps along top plates and around structural elements. Pay special attention to mechanical penetrations like furnace flues, chimneys, plumbing stacks, and recessed lights, as these are common sources of air leaks. Be cautious while moving around – only step on joists or truss chords to avoid damaging the ceiling below. Once you’ve identified the leaks, gather the necessary tools and materials to seal them effectively.
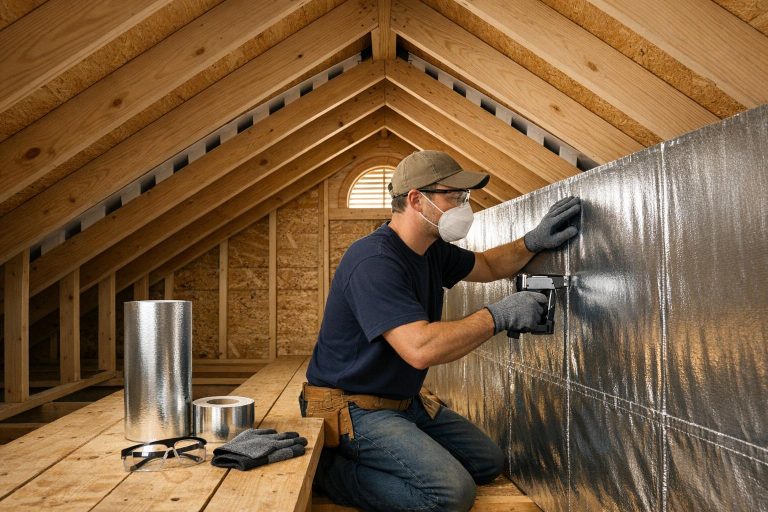
Tools, Materials, and Safety Equipment
Make sure you have all the materials you need before heading into the attic. Here’s a quick guide to sealing different gap sizes:
- Small gaps (under ¼ inch): Use silicone or acrylic latex caulk.
- Medium gaps (¼ inch to 3 inches): Expanding spray foam works well.
- Large gaps (over 3 inches): Use rigid foam board, drywall, or fiberglass insulation as backing before applying foam.
For areas around furnace flues or chimneys, stick to high-temperature silicone caulk and aluminum flashing – avoid using spray foam near heat sources.
You’ll also need some essential tools: a utility knife, sheet metal scissors for cutting flashing, a tape measure, a staple gun, and a caulk gun. Safety gear is non-negotiable – wear a dust mask or respirator, safety glasses, gloves, and a hard hat to protect yourself from roofing nails. If you’re working during hot weather, start early in the day and stay hydrated. Since attics are often poorly lit, bring a portable light or flashlight, and consider using kneepads for added comfort while working.
sbb-itb-8db64ac
How to Seal Key Attic Areas
To seal your attic effectively, start by cleaning surfaces to remove dust and debris – this ensures the sealant adheres properly. Below are specific methods for addressing electrical fixtures, plumbing gaps, and areas with high heat.
Sealing Electrical Fixtures and Recessed Lights
First, check whether your recessed lights are ICAT-rated (Insulation Contact Air Tight). Non-ICAT fixtures can overheat and pose a fire risk if insulation touches them. The U.S. Department of Energy advises: "All non-ICAT recessed light fixtures shall be boxed with a solid material such as drywall or rigid foam, that is sealed at all seams with a sealant such as caulk, mastic, or spray foam".
For non-ICAT fixtures, build a box using rigid foam or drywall, leaving a 3-inch clearance around the light. Seal all seams with caulk or spray foam. For standard electrical boxes, pull back insulation and fill any gaps with caulk or foam. Small wiring penetrations through top plates should also be sealed with spray foam or caulk.
Sealing Plumbing and Top-Plate Gaps
Top plates – those horizontal boards where walls meet the attic floor – are common culprits for air leaks. Use caulk for gaps smaller than ¼ inch. For openings between ¼ inch and 3 inches, apply expanding spray foam. If gaps exceed 3 inches, first fill them with an insulation backer before using foam.
Because expanding foam is sticky, wear gloves and be cautious to avoid contact with your clothing. Work systematically to seal all seams along top plates and around plumbing penetrations.
Sealing Around Chimneys, Flues, and Vents
High-heat areas like chimneys and flues require special attention since regular spray foam and caulk can melt or ignite. Avoid using these materials near high temperatures. Instead, cut sheet metal to fit around the flue pipe and use fire-rated caulk to seal the gap between the metal and the attic floor framing. Metal collars and blocking help maintain the necessary 2-inch clearance from combustible materials while stopping air leaks.
Check for large cavities or "chases" around chimneys that might be hidden beneath insulation, as these can allow significant air leakage. If your home uses natural draft combustion appliances, such as certain water heaters or furnaces, schedule a combustion safety test after sealing to ensure proper venting and to avoid dangerous backdrafting. This step is crucial to maintaining safety while improving energy efficiency.
Combining Air Sealing with Insulation and HVAC
Targeted air sealing is a cornerstone of energy efficiency. It lays the groundwork for insulation, HVAC performance, and moisture control. By sealing first, you ensure that all subsequent upgrades function as intended.
Air Sealing Before Insulating
Seal air leaks before upgrading or adding insulation. Addressing gaps first prevents active leaks from being buried under insulation layers. As noted by Building America’s Top Innovations Hall of Fame:
"Air sealing all major leaks must be a pre-cursor to installing insulation to ensure the leaks are sealed before they become inaccessible".
Air movement through leaks can significantly reduce insulation’s R-value, often visible as "dirty" fiberglass. Insulation doesn’t stop air movement; it only limits heat transfer. By sealing gaps first, you allow insulation to perform as intended, without air bypassing its thermal barrier.
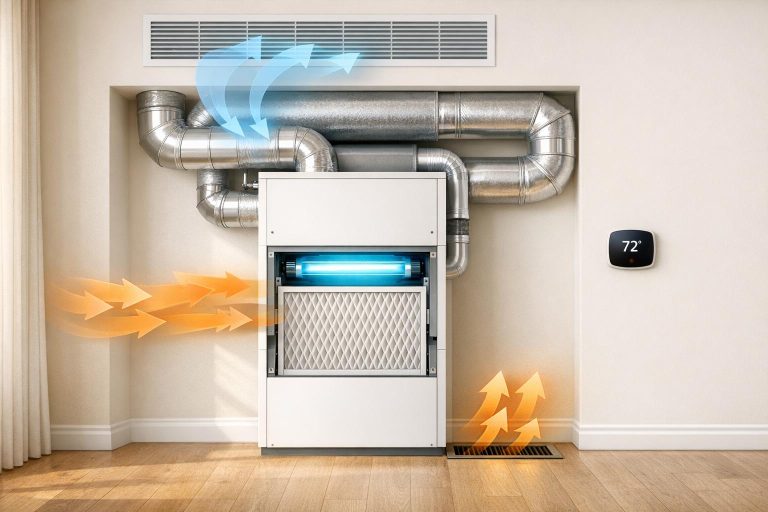
How Air Sealing Improves HVAC Performance
Sealing attic leaks minimizes the stack effect, which otherwise forces your HVAC system to work harder. Without sealing, conditioned air escapes, and unconditioned air from crawl spaces or wall cavities is drawn in, increasing the system’s workload.
By eliminating these leaks, your HVAC system maintains consistent indoor temperatures more efficiently. This results in lower energy bills and extends the lifespan of your equipment. However, in tighter homes, older appliances might need adjustments for combustion air. Always perform a back-drafting test after sealing to confirm exhaust gases are venting properly. This approach not only increases comfort but also supports effective moisture control.
Controlling Moisture and Vapor
Air barriers prevent warm, moisture-filled indoor air from reaching your cold attic, where it can condense on rafters, sheathing, and joists. Such condensation fosters mold growth, wood rot, and structural damage. In winter, frosty spots on insulation often indicate escaping warm air freezing upon contact with cold surfaces.
Sealing also helps prevent ice dams by keeping heat inside and ensuring proper venting to the outdoors. As your home becomes more airtight, consider adding mechanical ventilation to maintain indoor air quality and avoid trapping pollutants like radon and VOCs. Envirosmart Solution offers annual maintenance packages that include attic inspections to check for air gaps, insulation integrity, and moisture problems. These coordinated efforts ensure your attic system works as a unified, efficient whole.
Testing and Maintaining Your Air Sealing Work
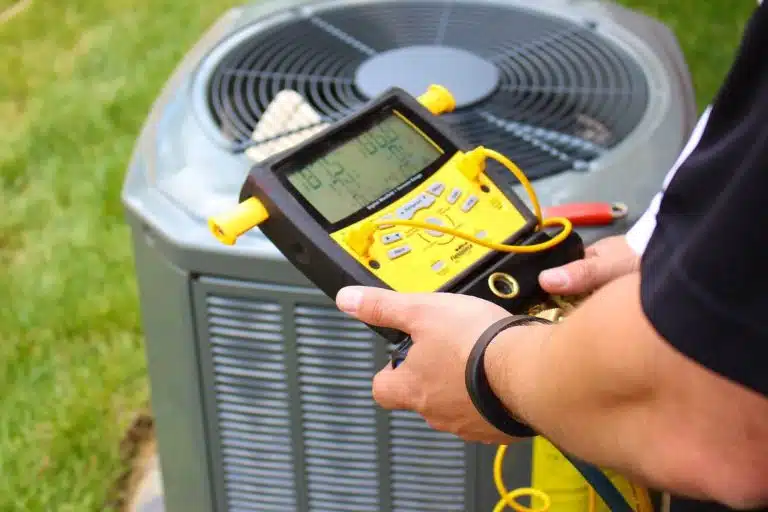
Keeping your home energy-efficient and safe doesn’t end with sealing up those leaks – it requires regular testing and maintenance to ensure everything is working as it should. Blower door testing, done by professionals, is one of the most effective ways to confirm your air sealing efforts are successful. This test depressurizes your home, helping to uncover leaks hidden in spots like behind kneewalls, under insulation, or within floor framing.
If hiring a professional isn’t an option right away, you can try a DIY pressurization check. Start by turning off combustion appliances and sealing all windows and doors. Then, run exhaust fans in your bathroom, kitchen, and laundry areas. Use an incense stick to detect leaks – hold it near potential problem areas and watch how the smoke behaves. While this method won’t give you exact measurements, it’s a practical way to identify spots that need attention before scheduling a more detailed blower door test.
Blower Door Testing for Air Sealing Quality
Blower door testing doesn’t just measure energy savings – it also ensures your home is safe. It can identify backdraft risks and check radon levels, both of which are critical for indoor air quality. Many local utility companies offer rebates for home energy assessments that include this type of testing, making it a more budget-friendly option.
Regular Attic Inspections
After sealing your home, staying on top of routine inspections is key to maintaining performance. Inspect your attic every two to three years, or more often in regions prone to extreme weather. Watch for signs like dark or dirty insulation, which can indicate air is still sneaking through gaps. In winter, frosty spots on insulation could mean warm air is escaping and condensing on cold surfaces. In summer, look for water stains or mold on rafters and joists – these are red flags for air leaks.
Don’t forget to check that soffit and ridge vents are clear of debris to prevent moisture buildup and ice dams. Keep an eye out for structural issues like cracked framing, damaged roof sheathing, or signs of pests such as droppings, nests, or chewed wiring. These problems can weaken your air seals over time. When inspecting, always walk on joists or truss chords – never on exposed ceiling drywall – to avoid accidents.
Annual Maintenance Programs
For ongoing peace of mind, professional maintenance programs can help keep your attic system in top shape. Companies like Envirosmart Solution offer packages such as CRAWL SPACE & ATTIC CARE™ for $199 and SMART GOLD™ for $699. These plans include thorough inspections, discounts on maintenance, and help with rebates and incentives from utility providers and government programs. Regular professional care ensures your attic system continues to function as a cohesive unit, with air sealing, insulation, ventilation, and moisture control working together to protect your home and reduce energy costs.
FAQs
How can I tell if my attic has air leaks?
If your attic has air leaks, there are a few telltale signs to watch for. Start by checking for dirty or discolored insulation – this often means air is moving through the material. You might also feel drafts, cold spots, or notice uneven temperatures in your home, particularly near the attic. Another clue? Rising energy bills without an obvious reason, as your HVAC system has to work overtime to keep your home comfortable. Lastly, keep an eye out for moisture or condensation on attic surfaces, which could indicate unwanted air exchange.
Catching these issues early can make a big difference in your home’s energy use and overall comfort. If you’re not sure where to start or need help, reaching out to professionals who specialize in attic air sealing and insulation can be a smart move.
How can I safely seal air leaks around chimneys and flues in my attic?
To properly seal air leaks around chimneys and flues, safety should be your top priority. Always use fire-rated materials and maintain adequate clearances to reduce the risk of fire. Begin by examining the space around the chimney or flue. Make sure there’s at least a 3-inch gap between the flue and any nearby insulation or flammable materials. Once confirmed, install a UL-rated metal collar around the flue and seal the joint with high-temperature, fire-rated caulk to close off any air leaks.
Next, construct a metal shield to add an extra layer of protection. This shield should extend 3 inches beyond the flue and stand at least 4 inches above the insulation. Secure it tightly to the attic framing to ensure insulation or other materials don’t come into contact with the flue’s surface. Finally, check for any remaining leaks using a smoke pencil or blower. This ensures the seal is airtight, improving energy efficiency and keeping your home safe.
Why is it important to seal air leaks before adding attic insulation?
Sealing air leaks is a crucial step before installing insulation if you want to maximize energy efficiency and keep your home comfortable. Without sealing, drafts and leaks can let your heated or cooled air escape, driving up your energy bills. Plus, unsealed leaks can allow moisture to get in, which might lead to mold growth or even damage your insulation and structural elements. By tackling air leaks first, you’ll ensure your insulation works as effectively as possible, saving you money and improving the air quality inside your home.