Blower door testing measures how much air escapes your home through unsealed gaps, helping you save energy and improve comfort. A calibrated fan lowers indoor pressure, drawing outside air through cracks, which technicians then locate and measure. Results show your home’s airtightness using metrics like CFM50 and ACH50, identifying areas to seal for better efficiency.
Key Points:
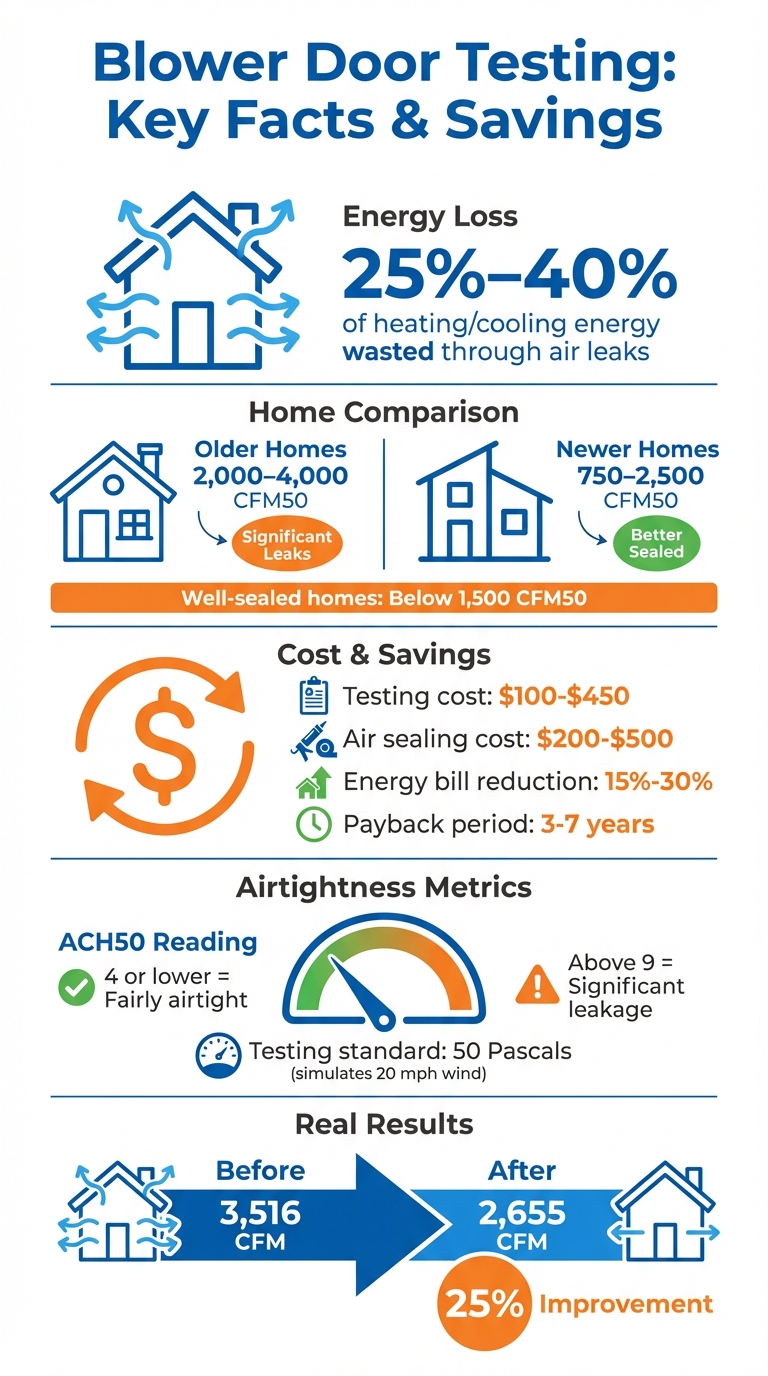
- Air leaks waste 25%-40% of energy used for heating and cooling.
- Older homes often leak more (2,000–4,000 CFM50) compared to newer homes (750–2,500 CFM50).
- Testing costs range from $100 to $450, with potential discounts from utility companies.
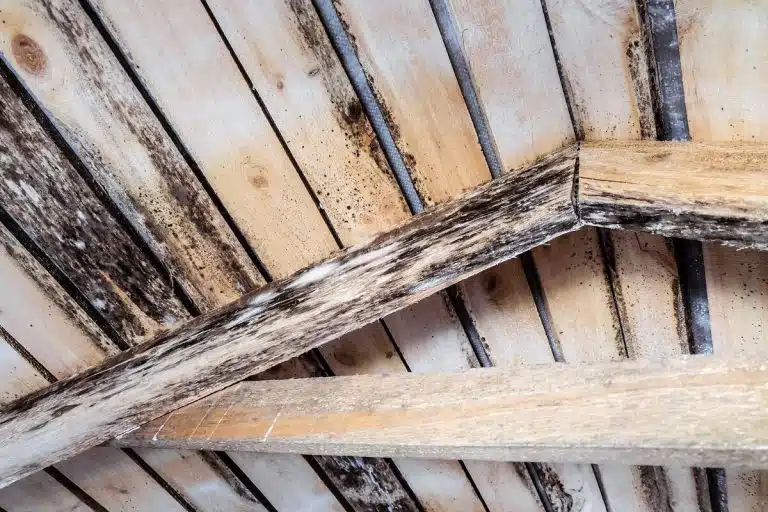
- Proper sealing reduces energy bills by 15%-30% and prevents moisture issues like attic and crawl space mold.
This test is especially useful if your home is older, you’ve made insulation updates, or you live in damp regions like the Pacific Northwest. By fixing leaks found during testing, you can lower costs, improve air quality, and create a more comfortable living space.
Blower Door Testing: Key Statistics and Energy Savings
What is a Blower Door Test? | Foam University
![]()
How Blower Door Testing Works
Blower door testing works by creating a controlled pressure difference between your home’s interior and the outdoors. This difference allows technicians to measure how much air escapes through unsealed gaps. The process provides insight into the overall air leakage of your home’s building envelope and identifies areas that need sealing or improvement.
Test Setup and Measurement
To prepare for the test, the technician ensures all exterior windows and doors are closed and locked, while all interior doors are opened to treat the conditioned space as a single zone. Any combustion appliances are turned off to avoid interference.
An adjustable frame with a flexible fabric panel is installed in an exterior doorway, and a variable-speed fan is mounted within this panel to create an airtight seal. When the fan runs, it pulls air out of the house, lowering the interior pressure. This causes outside air to flow in through any cracks, gaps, or openings in the walls, ceilings, or floors.
A digital manometer is used to measure the pressure difference between the inside and outside of the home. The testing standard is set at 50 Pascals (Pa), which simulates the effect of a 20-mph wind pressing against the house from all sides. The manometer also measures the airflow (in cubic feet per minute or CFM) required to maintain this pressure difference. Homes with good sealing typically measure below 1,500 CFM at 50 Pascals, while readings above 4,000 CFM indicate substantial leakage.
"The manometer enables me to measure the pressure difference between inside and outside, as well as the pressure across the fan, which correlates with the airflow rate." – Marc Rosenbaum, P.E., Owner, Energysmiths
For a deeper analysis, you can request a multi-point test, which takes measurements at various pressure levels – such as 60, 50, 40, 30, and 25 Pascals. This method gives a more detailed understanding of how air leakage behaves under different conditions.
Equipment Required
Once the controlled pressure environment is established, specialized tools are used to measure and locate air leaks. The blower door fan is a key component, creating the pressure difference by moving large amounts of air. The digital manometer, connected to the fan and the outdoors via tubes, provides real-time pressure and airflow readings.
Additional tools help pinpoint specific leaks while the home is depressurized. An infrared camera highlights temperature differences, showing cooler areas where outside air is entering – often around walls, windows, or ceilings. A smoke pencil releases small, visible puffs of smoke to track air movement through cracks near outlets, baseboards, or attic hatches.
| Equipment Tool | Purpose |
|---|---|
| Blower Door Fan | Creates a pressure difference with a variable-speed fan |
| Digital Manometer | Measures pressure differences and airflow rate |
| Adjustable Frame/Panel | Fits into an exterior door to create an airtight seal for the fan |
| Infrared Camera | Detects temperature changes to identify air leaks or missing insulation |
| Smoke Pencil | Tracks air movement visually by releasing non-toxic smoke |
Preparing Your Home for the Test
Getting your home ready for a blower door test is key to ensuring the results accurately reflect its natural air leakage under normal conditions.
Closing and Sealing Openings
Before the test begins, follow these steps to minimize disruptions and ensure precise measurements:
- Lock all exterior doors and windows. This ensures they’re fully sealed against the weatherstripping and won’t accidentally blow open during the test. Randy Williams, a Builder and Energy Auditor, explains:
"I like to lock doors not only to ensure they are tightly closed but also to keep people from opening a door during a test. On one occasion, an exterior door opened during testing, significantly altering the pressure."
- Open all interior doors. This includes doors to closets and built-in cabinets, allowing the technician to treat the entire conditioned space as a single zone.
- Turn off all combustion appliances and HVAC systems. Set gas water heaters and furnaces to "pilot" mode to prevent backdrafting carbon monoxide during the test. Also, turn off bathroom exhaust fans, kitchen range hoods, clothes dryers, and any whole-house ventilation systems.
- Close fireplace dampers and woodstove air inlets. Make sure all fires are completely out, and cover any fireplace ashes with damp newspapers to prevent them from being pulled into your home.
Other Preparation Steps
- Seal plumbing traps. Fill them with water or tape them off to block air and sewer gases from entering your home.
- Secure window air conditioning units. If they tend to leak air and are typically removed during the winter, cover them with plastic sheeting.
- Ensure access to attic and crawl spaces. Open hatches in conditioned areas, but keep them closed in unconditioned spaces.
- Keep track of appliances you’ve turned off. Place your car keys next to any appliance you’ve shut down as a reminder to turn them back on later.
Lastly, the test is safe for everyone, including pets, plants, and children, so they can remain in the home during the process.
Finding and Fixing Air Leaks
When a blower door test depressurizes your home, outside air rushes through every unsealed gap, making it easy to identify hidden leaks.
Leak Detection Methods
After setting up the test, technicians use specific tools to zero in on the leaks. Infrared cameras are a key tool – they highlight temperature differences that show where air is infiltrating. Nontoxic smoke or fog devices are also used to trace the paths of escaping air. As Energy Consultant Marc Rosenbaum explains:
"When you use a fog machine and you have fog blowing out of a hole in the building, I’ve never had anyone point to it and say, ‘Why isn’t that good enough?’"
Sometimes, leaks reveal themselves through hissing sounds or drafts, which can often be felt with a damp hand during testing. Common trouble spots include attic hatches, recessed lighting, plumbing vents, and chimney chaseways on upper levels. In basements, rim joists and utility penetrations are frequent culprits, while in living areas, electrical outlets, window frames, and fireplace dampers are typical problem areas.
Once leaks are identified, the next step is applying targeted solutions to seal them effectively.
Sealing and Insulation Solutions
Pinpointing leaks allows for focused repairs that improve energy efficiency. Start by sealing areas with the highest pressure differences. Use caulk for small, stationary gaps, weatherstripping for moving parts, and low-expansion spray foam for larger openings. In high-temperature zones, materials like sheet metal combined with furnace cement caulk are essential for safety.
Air sealing projects are relatively affordable, typically costing between $200 and $500, and they can cut heating and cooling bills by 10% to 40%. These upgrades often pay for themselves within 3 to 7 years through energy savings. To ensure repairs are effective, many professionals use the blower door fan during the sealing process.
| Leak Location | Recommended Material | Gap Size |
|---|---|---|
| Window/Door Frames | Caulk (Polyurethane or Silicone) | Small cracks |
| Operable Windows/Doors | Weatherstripping | Moving components |
| Utility Penetrations | Low-expansion Spray Foam | Large gaps |
| Electrical Outlets | Foam Gaskets | Subtle drafts |
| High-Temperature Vents | Sheet Metal & Furnace Cement | Fire zones |
sbb-itb-8db64ac
Why Blower Door Testing Matters
Blower door testing provides clear data that can directly affect your energy costs and indoor comfort. It measures your home’s airtightness using the ACH50 metric – a standard used to gauge how much air leaks in and out of your house. A reading of 4 or lower indicates a home is fairly airtight, while anything above 9 reveals significant air leakage. These detailed results allow you to focus on the repairs that will have the biggest impact on energy efficiency and comfort.
Lower Energy Bills
By sealing the leaks identified during a blower door test, you could cut your annual heating and cooling expenses by 15% to 30%. The test results help you prioritize the areas that need attention, ensuring your efforts are focused on the gaps that are costing you the most.
Better Comfort and Air Quality
The benefits go beyond just saving money. Blower door testing can significantly improve your home’s comfort by eliminating drafts, balancing indoor temperatures, and getting rid of those annoying cold spots. Plus, it helps protect your air quality by identifying where outdoor pollutants – like wildfire smoke, allergens, odors, or even pests – might be sneaking in.
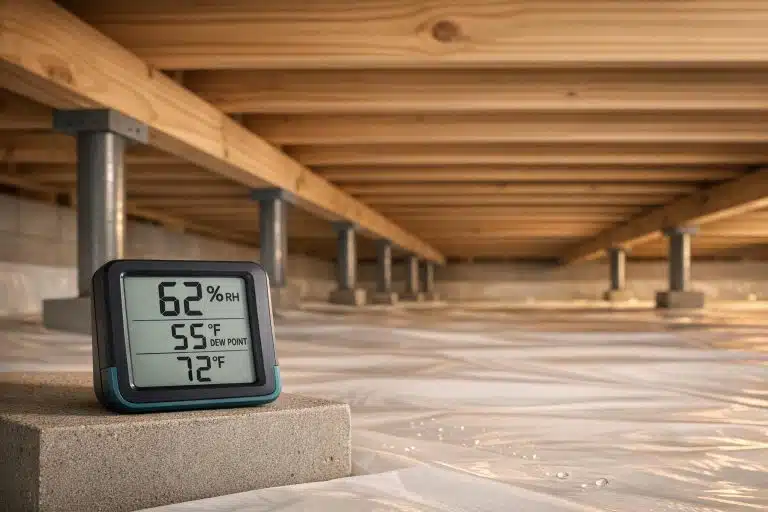
Sealing leaks also reduces the risk of moisture problems. When humid air enters through cracks and condenses inside walls or ceilings, it can lead to mold, mildew, or even structural damage. In some cases, the test might show that your home is so well-sealed that mechanical ventilation is needed to ensure proper airflow for fuel-burning appliances and to maintain fresh air levels.
For instance, in July 2025, RetroFoam’s "Foam University" highlighted a residential project with an initial air leakage rate of 3,516 CFM. After applying foam insulation to seal the gaps, a follow-up test showed a reduction to 2,655 CFM – a nearly 25% improvement in airtightness and energy efficiency. This kind of targeted assessment not only improves energy performance but also sets the stage for further enhancements, like those offered by Envirosmart Solution.
Using Envirosmart Solution Services After Testing
![]()
Once a blower door test identifies air leaks in your home, the next step is sealing them to improve efficiency. Envirosmart Solution offers a range of services tailored to resolve the specific issues found during testing, such as sealing air ducts, upgrading insulation, and maintaining HVAC systems. These solutions are designed to enhance comfort and reduce energy costs.
Services That Address Test Results
Blower door tests often reveal common problem areas like leaky air ducts, gaps in insulation, and openings in attics or crawl spaces. For duct leaks, Envirosmart Solution uses Aeroseal technology, a safe and effective method that seals holes up to 5/8 of an inch. Leaky ducts can waste up to 30% of your HVAC system’s conditioned air, leading to higher energy bills. As Envirosmart Solution notes:
"Sealing your ducts can cut your energy bills and eliminate uncomfortable drafts and air quality problems in your home."
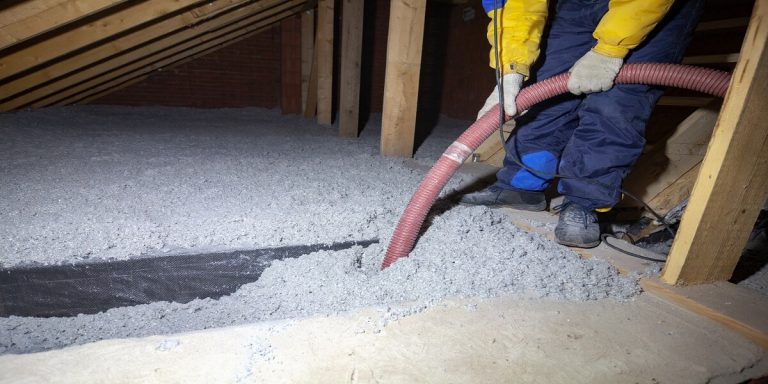
After testing, their team also inspects areas like attics, walls, crawl spaces, and basements to address any gaps. Insulation services include both installation and removal in spaces like attics and crawl areas, as well as applying vapor barriers to manage moisture. For homes that require better airflow after sealing, they offer solutions such as solar and whole-house fans. Right now, you can take advantage of a $500 discount on fans by using the coupon code KA22BUK. They also provide rodent-proofing services to protect newly sealed areas from potential damage.
Rebates and Maintenance Programs
To make the most of your home upgrades, Envirosmart Solution helps homeowners access rebates and maintenance programs. They assist in securing rebates and incentives for energy-efficient improvements, and financing options are available for larger projects.
For ongoing care, the SMART GOLD™ Complete Care Package, starting at $699 per year, helps ensure your home remains efficient after the initial repairs. This annual maintenance plan covers essentials like dryer vents, air ducts, crawl spaces, attics, and furnaces. Subscribers also get 20% off additional technician-recommended services, priority scheduling, and no diagnostic fees for furnace issues. Regular maintenance not only preserves your energy savings but also helps avoid unexpected repair costs.
Conclusion
Blower door testing gives you a clear picture of where your home is losing energy. By measuring air leakage at 50 pascals of pressure, the test calculates your home’s ACH50 score – a key metric that shows how airtight (or leaky) your building envelope really is. It identifies exactly where conditioned air is escaping and where outside air is sneaking in.
This information sheds light on areas of major energy loss. By properly sealing these leaks, you can cut energy costs significantly. But the benefits don’t stop there. You’ll also experience improved indoor air quality, fewer drafts, and reduced wear and tear on your HVAC system.
With these results in hand, homeowners can move from diagnosis to action. Testing is just the first step – what you do with the findings is what truly makes the difference. Envirosmart Solution takes your test data and addresses the specific issues uncovered, whether that means cleaning and sealing ducts, adding insulation in your attic, or installing vapor barriers in crawl spaces. They also guide you in accessing rebates and incentives to help make these upgrades more affordable. Turning test results into targeted repairs ensures your home becomes more efficient over time.
For homeowners in the Pacific Northwest, this process is especially valuable. From the initial test to repairs and ongoing maintenance through programs like SMART GOLD™, experts provide support every step of the way. The ultimate goal? To transform test findings into real improvements that lower energy bills, boost comfort, and protect your home’s structure for the long haul.
FAQs
What is considered a “good” ACH50 or CFM50 score for my home?
A "good" ACH50 score is generally 3 or below, which signals that your home is highly airtight. For CFM50, a range between 600 and 1,000 points to excellent energy efficiency. These figures indicate that your home is well-sealed, minimizing energy loss and maintaining better energy performance.
Will sealing air leaks make my home too tight and require ventilation?
Sealing air leaks can boost both energy efficiency and comfort in your home, but it doesn’t mean your house will become "too tight." In fact, achieving the right level of building tightness helps lower energy consumption, minimize moisture problems, and keep outdoor pollutants at bay. If your home becomes extremely airtight, you might need mechanical ventilation to maintain good indoor air quality and ensure a steady supply of fresh air. A blower door test is a helpful tool to determine if ventilation adjustments are needed to keep your living space healthy and comfortable.
How long does a blower door test take, and do I need to leave?
A blower door test typically lasts between 15 and 30 minutes, depending on the size of your home and how detailed the assessment needs to be. You don’t have to leave your home during the process – it’s completely safe to stay. Just be sure to follow any directions the technician gives you to help ensure the results are accurate and everything runs smoothly.