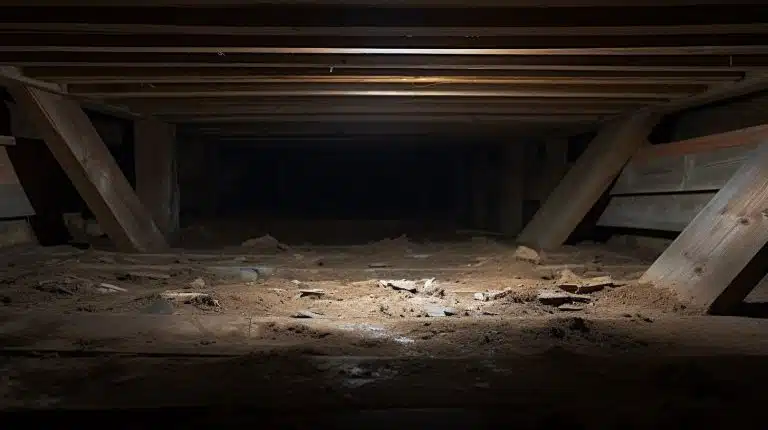
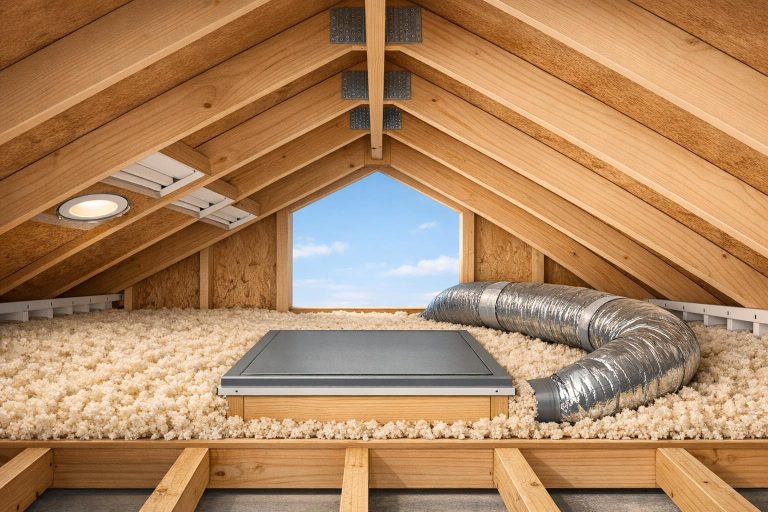
Crawl spaces can cause up to 15% of your home’s heat loss and contribute 50% of the air inside your home, making proper crawl space insulation essential for energy savings and moisture control. Two popular options are radiant barriers and reflective insulation. Here’s a quick breakdown:
- Radiant Barriers: Thin aluminum-based sheets that reflect 97% of radiant heat. Best for hot climates to reduce cooling costs. Requires a 1-inch air gap for effectiveness but lacks an R-value for conductive heat resistance.
- Reflective Insulation: Combines reflective foil with a foam or bubble core, offering both radiant heat reflection and an R-value. Ideal for year-round use, especially in humid or cold areas, as it also acts as a vapor barrier.
Key Takeaway: Radiant barriers are cost-effective for hot regions, while reflective insulation is better for moisture control and consistent thermal resistance in mixed climates. Choose based on your home’s climate, moisture levels, and budget.
Crawl Space Insulation Vapor Barrier Material Comparison
sbb-itb-8db64ac
Radiant Barriers: What They Are and How They’re Used
Radiant barriers are thin sheets, usually made from highly reflective aluminum foil, that are laminated onto materials like kraft paper, plastic film, or OSB (oriented strand board). Unlike traditional insulation, which works by slowing heat transfer through solid materials, radiant barriers are designed to reflect radiant heat instead of absorbing it. To meet ASTM C1313 standards, a radiant barrier must reflect at least 90% of radiant heat. Here’s a closer look at how they work, their benefits, and their limitations – particularly in crawl spaces.
How Radiant Barriers Work
Radiant barriers function through two key properties: high reflectivity (bouncing heat away) and low emissivity (minimizing heat emitted from their surface). These features allow them to reflect up to 97% of radiant heat. However, they need an air gap of at least 1 inch (2.5 cm) to work effectively. Without this gap, the material will conduct heat through direct contact, losing its reflective qualities. For maximum efficiency, the barrier should be positioned at a right angle to incoming radiant energy.
In crawl spaces, radiant barriers act as a thermal shield. During hot summer months, they block heat from entering through the floor. In colder months, they reflect heat back toward the floor above, preventing it from escaping into the cold ground. Since radiation accounts for about 90% of heat transfer in enclosed spaces like crawl spaces, radiant barriers directly target this primary source of heat loss.
Benefits of Radiant Barriers in Crawl Spaces
The main advantage of radiant barriers is their ability to lower energy costs. In warm, sunny regions, they can reduce cooling expenses by 5% to 10%, with some hot climates seeing savings as high as 15%. They’re also helpful in winter, as up to 75% of heat loss during colder months comes from radiant heat transfer. By reducing the radiant heat load on your home’s structure, radiant barriers ease the strain on your HVAC system, which can lead to noticeable utility savings.
Installing radiant barriers is relatively simple. When stapled across the bottom of floor joists, they create the necessary air gap between the subfloor and the barrier. Additionally, many radiant barriers can act as vapor barriers when sealed properly. This dual function helps control ground moisture and prevents issues like condensation, mold, and wood rot. However, it’s important to weigh these advantages against their limitations.
Limitations of Radiant Barriers
One key limitation is that radiant barriers lack an R-value, meaning they don’t slow conductive heat transfer through solid materials. As the U.S. Department of Energy explains:
"Radiant barriers consist of a highly reflective material that reflects radiant heat rather than absorbing it. They don’t, however, reduce heat conduction like thermal insulation materials."
To get the best performance, radiant barriers should be used alongside traditional insulation, such as fiberglass batts or foam board. In extremely cold climates, it’s often more cost-effective to focus on adding more thermal insulation rather than installing a radiant barrier.
Another drawback is dust accumulation, which can significantly reduce the barrier’s ability to reflect heat over time. Proper installation techniques are crucial to minimize dust buildup and maintain long-term performance. Additionally, safety is a concern: since aluminum foil conducts electricity, radiant barriers must never come into contact with exposed electrical wiring during installation.
Reflective Insulation: What It Is and How It’s Used
Building on the principles of radiant barrier technology, reflective insulation offers a combination of heat reflectivity and thermal resistance.
Reflective insulation pairs highly reflective aluminum surfaces with an insulating core, such as polyethylene bubbles, foam, or fiberglass. Unlike a simple foil barrier, this design creates a thermal break that reduces heat transfer. The reflective foil layers bounce radiant heat away, while the insulating core resists conductive heat flow. Together, they deliver a measurable R-value, which indicates the material’s ability to resist heat transfer.
In crawl spaces, reflective insulation is applied to walls, floors, or ceilings to act as both a thermal and vapor barrier. The foil surfaces reflect heat, while the core slows heat conduction. To comply with ASTM C1313 standards, the reflective surface must achieve at least 90% reflectivity, with some high-quality products reflecting up to 97% of radiant heat.
How Reflective Insulation Works
Reflective insulation works by addressing heat transfer in two ways. The aluminum foil reflects radiant heat, while the insulating core – made of bubbles or foam – reduces conductive heat flow. For maximum effectiveness, an air gap of at least 1 inch is required. Without this gap, the material can conduct heat instead of reflecting it. When installed beneath floor joists, reflective insulation can prevent up to 97% of radiant heat loss from the living space to the crawl space during colder months.
A solid, non-perforated version of reflective insulation can also act as a vapor barrier, blocking ground moisture from entering the home. This helps reduce the risk of mold, mildew, and wood rot. Unlike fiberglass insulation, which can absorb water and lose its insulating properties, reflective insulation made of polyethylene and aluminum remains effective in humid conditions. This dual function makes it a reliable choice for improving thermal performance across different climates.
Advantages of Reflective Insulation in Crawl Spaces
Reflective insulation stands out because it combines thermal resistance (measurable R-value) with moisture control in a single material. Some foam-core products boast R-values as high as R-22, providing strong resistance to heat flow.
This insulation performs well in both hot and cold climates. In warmer weather, it prevents heat from entering crawl spaces, while in colder seasons, it helps retain warmth in living areas. Its tough, tear-resistant construction also helps deter pests. In sealed crawl spaces, reflective insulation creates a thermal envelope that stabilizes temperatures and reduces condensation. These benefits translate into greater energy efficiency and comfort.
Costs vary depending on the product. For instance, a basic SmartSHIELD 5mm Reflective Foam Insulation Roll (Foil/Foil) costs around $39.95, while a premium 10mm R-22 Reflective Foam Core Insulation Roll is priced closer to $119.95. In sunny regions, homeowners can expect cooling cost savings of 5% to 10%, making reflective insulation a worthwhile investment over time.
Drawbacks of Reflective Insulation
One downside of reflective insulation is its higher upfront cost compared to basic radiant barriers, largely due to the additional insulating core. This can be a concern for homeowners working with large crawl spaces and tight budgets.
Improper installation in humid conditions can lead to trapped condensation between layers, reducing performance. Ensuring proper air gaps and ventilation is key to avoiding this issue. Dust accumulation on the reflective surface can also diminish its effectiveness. To minimize this, install the foil side facing downward toward the ground.
Because aluminum is conductive, reflective insulation should not come into contact with bare electrical wiring during installation. Additionally, while the material provides a measurable R-value, it may not be sufficient as a standalone solution in extremely cold climates. Pairing reflective insulation with traditional options like foam boards or batts can enhance overall thermal performance and maintain a strong thermal envelope.
Main Differences: Radiant Barriers vs. Reflective Insulation
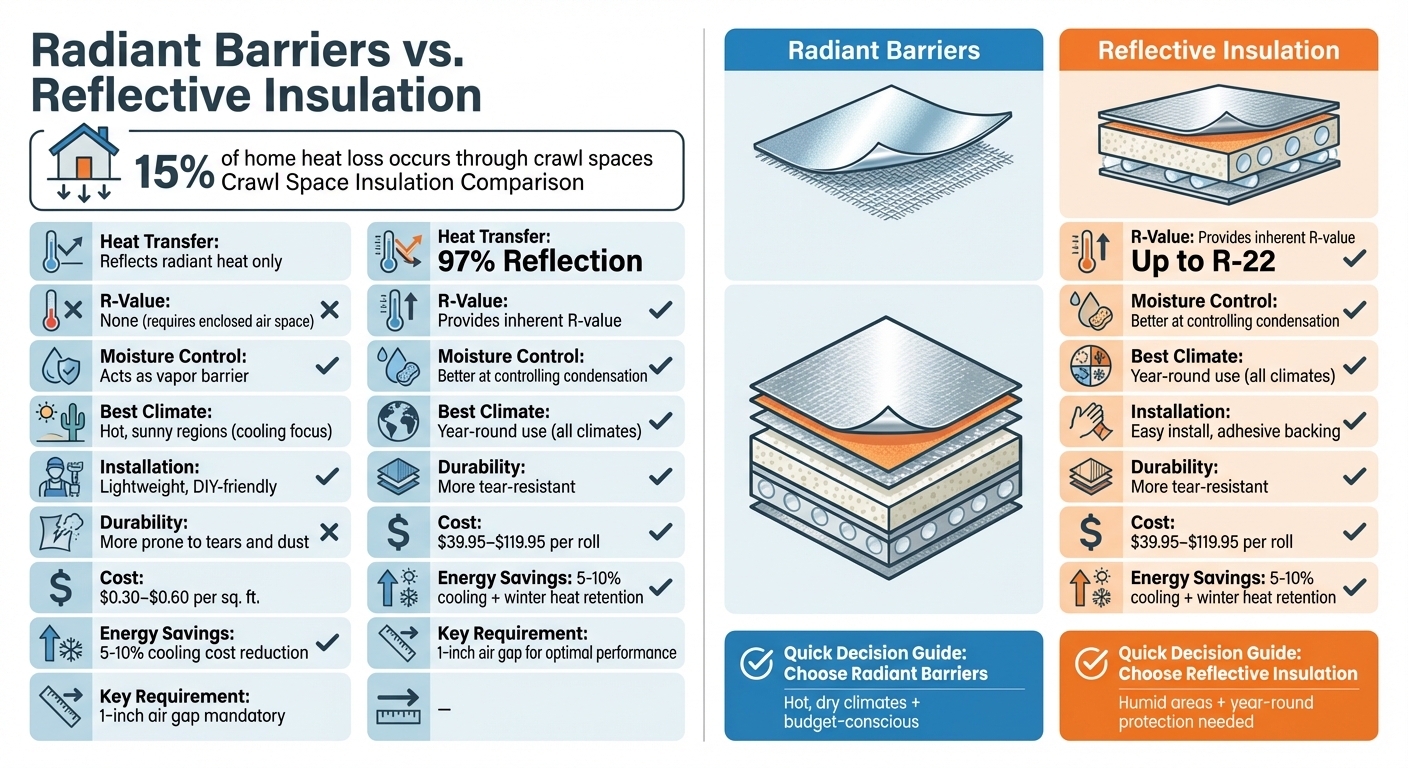
Radiant Barriers vs Reflective Insulation Comparison Chart
Let’s dive into the key distinctions between radiant barriers and reflective insulation. Both rely on aluminum foil to reflect heat, but their construction and functionality set them apart. Radiant barriers consist of a single reflective layer, while reflective insulation pairs foil with an insulating core, such as foam or bubbles.
The primary difference lies in their approach to heat transfer. Radiant barriers reflect radiant heat back toward its source and require an air gap to work effectively. Reflective insulation, on the other hand, not only reflects radiant heat but also resists conductive heat flow due to its insulating core, which traps air and provides an inherent R-value.
Climate plays a major role in determining which option is better. Radiant barriers shine in hot, sunny climates, where reducing cooling costs is the goal. According to the U.S. Department of Energy, they can cut cooling expenses by 5% to 10% in warm regions. Reflective insulation, with its built-in thermal resistance, is better suited for year-round use, especially in crawl spaces that face both hot summers and cold winters.
Comparison Table: Radiant Barriers vs. Reflective Insulation
| Feature | Radiant Barrier | Reflective Insulation |
|---|---|---|
| Structure | Thin foil with woven scrim | Foil layers with an insulating foam/bubble core |
| Heat Transfer | Reflects radiant heat only | Reflects radiant heat and resists conduction |
| Inherent R-Value | None (requires an enclosed air space) | Provides inherent R-value due to its core |
| Moisture Control | Acts as a vapor barrier | Better at controlling condensation |
| Best Climate | Hot, sunny regions (cooling focus) | Suitable for year-round use |
| Installation | Lightweight and DIY-friendly | Easy to install, often with adhesive backing |
| Durability | More prone to tears and dust | More tear-resistant |
| Cost Range | ~$0.30–$0.60 per sq. ft. | ~$39.95–$119.95 per roll |
This breakdown highlights the strengths of each option, making it easier to choose the right insulation for your crawl space.
Which Option Works Best for Your Crawl Space?
Your decision ultimately comes down to climate, moisture levels, and budget. In dry, hot climates, a radiant barrier is a cost-effective solution for reducing cooling loads, provided it’s installed with the necessary air gap.
However, if you’re dealing with damp crawl spaces or live in a region with cold winters, reflective insulation is often the better choice. Its insulating foam core not only helps control condensation but also provides year-round thermal resistance, delivering better comfort and moisture management – though it does come at a higher upfront cost. Up next, we’ll explore installation and maintenance tips to get the most out of your chosen insulation.
Installation and Maintenance Requirements
DIY vs. Professional Installation
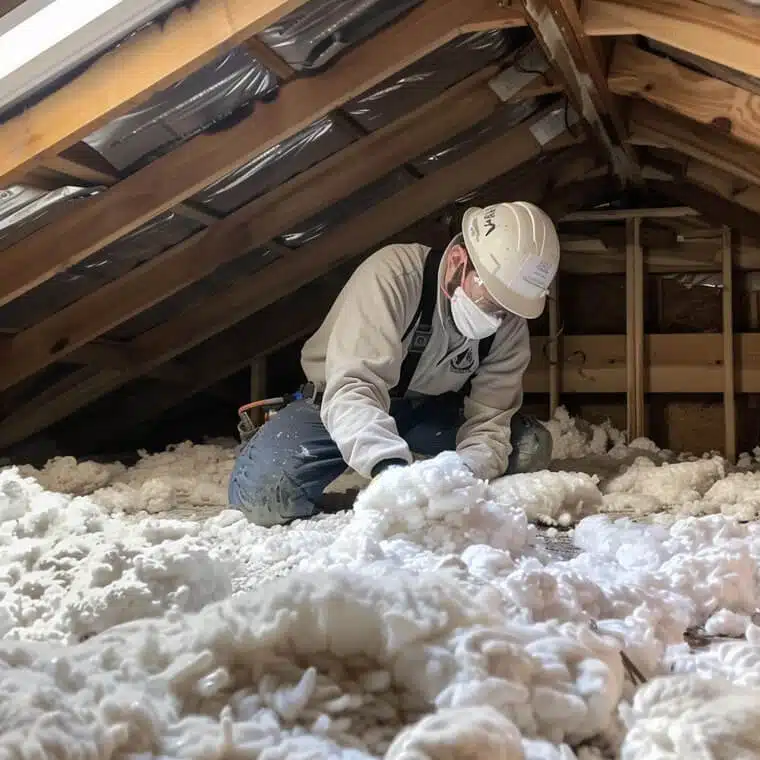
Both systems are lightweight and can be installed with basic tools, making them suitable for DIY enthusiasts. If you’re tackling this yourself, expect material costs to range from $1.00 to $3.00 per square foot.
However, for more intricate projects – like those in tight spaces or areas prone to moisture – professional installation might be the safer bet. Professional services typically cost $3.00 to $6.00 per square foot and ensure critical factors like air gaps, moisture control, and compliance with local building codes are properly addressed. For example, Envirosmart Solution specializes in crawl space insulation across the Pacific Northwest, managing everything from material selection to ensuring proper installation. Pro tip: Avoid contact with exposed wiring during installation, as aluminum foil is highly conductive.
Remember, proper installation is only the first step. Keeping things in good shape through regular maintenance is just as important for maintaining energy efficiency and comfort.
Maintenance Tips for Long-Term Performance
The biggest enemy of these systems? Dust. Over time, dust build-up can reduce the reflective surface’s ability to reflect heat – so an annual inspection and gentle cleaning are essential to maintain its 97% heat reflection efficiency.
Here’s what to keep in mind for ongoing maintenance:
- Air gap matters: Ensure the 1-inch air gap is intact and that all seams remain securely taped to keep the insulation effective.
- Watch for moisture: Be on the lookout for condensation, mold, or wood rot, especially in humid climates.
- Check for pests: Rodents or other pests can damage or displace the material, so inspect regularly for signs of activity or rodent infestations.
If you prefer to leave upkeep to the pros, Envirosmart Solution offers a Crawl Space & Attic Care™ annual maintenance package for $199. This includes a comprehensive insulation check, air gap verification, rodent inspections, and a 15% discount on any necessary repairs. With regular maintenance like this, your insulation system will continue to deliver the energy efficiency and moisture control you invested in.
Energy Efficiency and Cost Savings
Short-Term vs. Long-Term Costs
Radiant barriers and reflective insulation offer a budget-friendly alternative to spray foam. Among these, reflective foil stands out as the most affordable upfront choice since it acts primarily as a thermal mirror rather than a full-fledged insulation system.
The real payoff, however, comes over time. Proper insulation and air sealing can lower heating and cooling costs by 10–20%. In warmer, sunnier areas, these systems can trim cooling expenses by 5% to 10%. Beyond energy savings, they also help prevent moisture-related issues like mold and wood rot, which can lead to costly repairs.
On top of that, reducing your home’s heat load means your HVAC system doesn’t have to work as hard. This not only extends the lifespan of your equipment but might also allow you to install a smaller, less expensive unit. Plus, rebates and incentives can further cut your overall costs.
How to Maximize Energy Rebates and Incentives
Federal and local programs can help offset installation expenses significantly. For instance, the Energy Efficient Home Improvement Credit (Section 25C) offers a 30% tax credit for qualifying insulation and air sealing upgrades, with an annual limit of $1,200. If you’re tackling multiple projects, like insulating a crawl space and adding a heat pump, consider spreading them across different tax years to make the most of the yearly credit cap.
Local utility programs can add even more savings. The Energy Trust of Oregon, for example, provides $0.30 per square foot for crawl space floor insulation, while Puget Sound Energy covers up to 95% of weatherization project costs. These rebates often require installation by certified contractors or "Trade Allies" to ensure the materials meet specific performance standards.
Envirosmart Solution simplifies the process for Pacific Northwest homeowners by managing all the paperwork, from manufacturer certifications to before-and-after photos. Their expertise ensures you claim every eligible rebate, turning what could be a complicated process into a smooth and rewarding experience.
Conclusion: Choosing the Right Insulation for Your Crawl Space
The best insulation choice for your crawl space depends on your local climate and specific conditions. For those in hot, sunny areas looking to cut down on cooling costs, a radiant barrier can reflect up to 97% of radiant heat. On the other hand, if moisture control is a year-round concern, reflective insulation with a foam or bubble core provides an effective R-value while doubling as a vapor barrier. These considerations are key when planning for installation and factoring in your region’s climate needs.
It’s essential to evaluate moisture levels and local building codes to determine the required R-value. For instance, insulation recommendations can range from R5–R13 in Zone 3 to R10–R19 in Zones 4–8. Additionally, ensure the insulation you choose includes the necessary 1.0-inch air gap for optimal performance.
"A radiant barrier’s effectiveness depends on proper installation, so it’s best to use a certified installer." – U.S. Department of Energy
Hiring professionals for installation is a smart move. Certified installers can ensure proper air gaps, seal seams correctly, and guarantee compliance with local codes. If your crawl space contains HVAC equipment or plumbing, experts can also recommend whether wall or ceiling insulation is better suited to integrate these systems into your home’s conditioned space.
For homeowners in the Pacific Northwest, Envirosmart Solution offers comprehensive crawl space insulation services. Their team handles everything from moisture assessments to professional installation. They even take care of rebate paperwork, including manufacturer certifications and before-and-after documentation, to help you access available incentives and energy savings. Plus, their CRAWL SPACE & ATTIC CARE™ package – priced at $199 – includes regular inspections and a 15% discount on recommended services, keeping your home energy-efficient for the long haul.
Ultimately, the right choice will depend on your climate, moisture concerns, and budget. With the right insulation, you can achieve lasting energy savings and a more comfortable home environment.
FAQs
Do I need floor insulation if I add a radiant barrier?
Adding a radiant barrier isn’t a substitute for proper floor insulation. While radiant barriers work by reflecting radiant heat, they don’t do much to limit heat transfer through conduction or convection. For improved energy efficiency and indoor comfort – especially in colder regions – it’s best to pair a radiant barrier with floor insulation. Together, they tackle different types of heat transfer, helping to keep temperatures steady and lower energy bills.
Should I insulate crawl space walls or the floor?
Insulating crawl space walls tends to be a smarter choice when it comes to improving energy efficiency and controlling moisture. By insulating the walls, you create a thermal barrier that helps maintain stable temperatures, lowers heating bills, and reduces the risk of mold growth by keeping humidity levels in check. On the other hand, insulating the floor doesn’t tackle moisture problems effectively and can even result in air leaks. To get the best outcome, pair wall insulation with vapor barriers to properly seal the crawl space.
How do I prevent condensation with reflective insulation?
To keep condensation at bay when using reflective insulation, it’s important to address both moisture and temperature differences in the crawl space. Reflective insulation, such as foil-based barriers, not only helps with insulation but also acts as a moisture barrier, helping to lower humidity levels. Maintaining proper ventilation and stable temperatures is key to reducing the risk of condensation. For added protection, consider installing a vapor barrier along with the reflective insulation to further limit moisture buildup, which is often a major culprit behind condensation in crawl spaces.