Your building envelope – walls, roof, windows, doors, and foundation – shields your home from weather, moisture, and energy loss. Regular inspections can catch small problems, like leaks or cracks, before they escalate into expensive repairs. This guide walks you through what to check, tools you’ll need, and how to prepare for a thorough visual inspection.
Key Points:
- Why Inspect? Prevent costly repairs, improve energy efficiency, and maintain comfort.
- What to Check? Roof, walls, windows, doors, seals, and foundation.
- Tools Needed: Binoculars, ladder, flashlight, camera, and notepad.
- When to Inspect? Annually, after storms, or during dry weather for visibility.
Inspecting your building envelope ensures your home stays protected and energy-efficient. Let’s dive into the details.
How to Inspect Your Staining & Flashing – DIY Series Ep. 3
Preparing for Your Inspection
Getting ready for an inspection is all about being thorough and organized. Make sure you have the right tools, review previous records, and pick the best weather conditions to spot small problems before they grow into bigger ones. A bit of preparation goes a long way toward ensuring a smooth and effective building envelope inspection.
Tools and Equipment You’ll Need
To get started, gather these essentials:
- Binoculars: Handy for examining hard-to-reach areas from a distance.
- A sturdy ladder: Provides safe access to roofs and gutters.
- Flashlight: Helps illuminate dark spaces like attics or crawl areas.
- Camera and notepad: Vital for documenting findings and taking notes.
Once your tools are ready, take a moment to review past inspection records to zero in on areas that might need extra attention.
Review Past Inspection Records
Before diving into the inspection, look over any previous reports or maintenance logs. These records provide a snapshot of the building’s condition over time, helping you track changes and spot recurring problems. By focusing on areas that have shown wear or issues in the past, you can prioritize repairs more effectively and avoid surprises.
Best Weather Conditions for Inspections
The weather plays a big role in how successful your inspection is. Aim for clear, dry days to ensure good visibility. That said, inspections right after rain can be revealing, as they might uncover active leaks or water infiltration. Similarly, after major storms or extreme weather, it’s smart to check for damage like missing shingles, blocked gutters, or new leaks. For regions like the Pacific Northwest, where heavy rain and wind are frequent, post-storm inspections are especially helpful in catching issues before they lead to interior damage.
Building Envelope Inspection Checklist
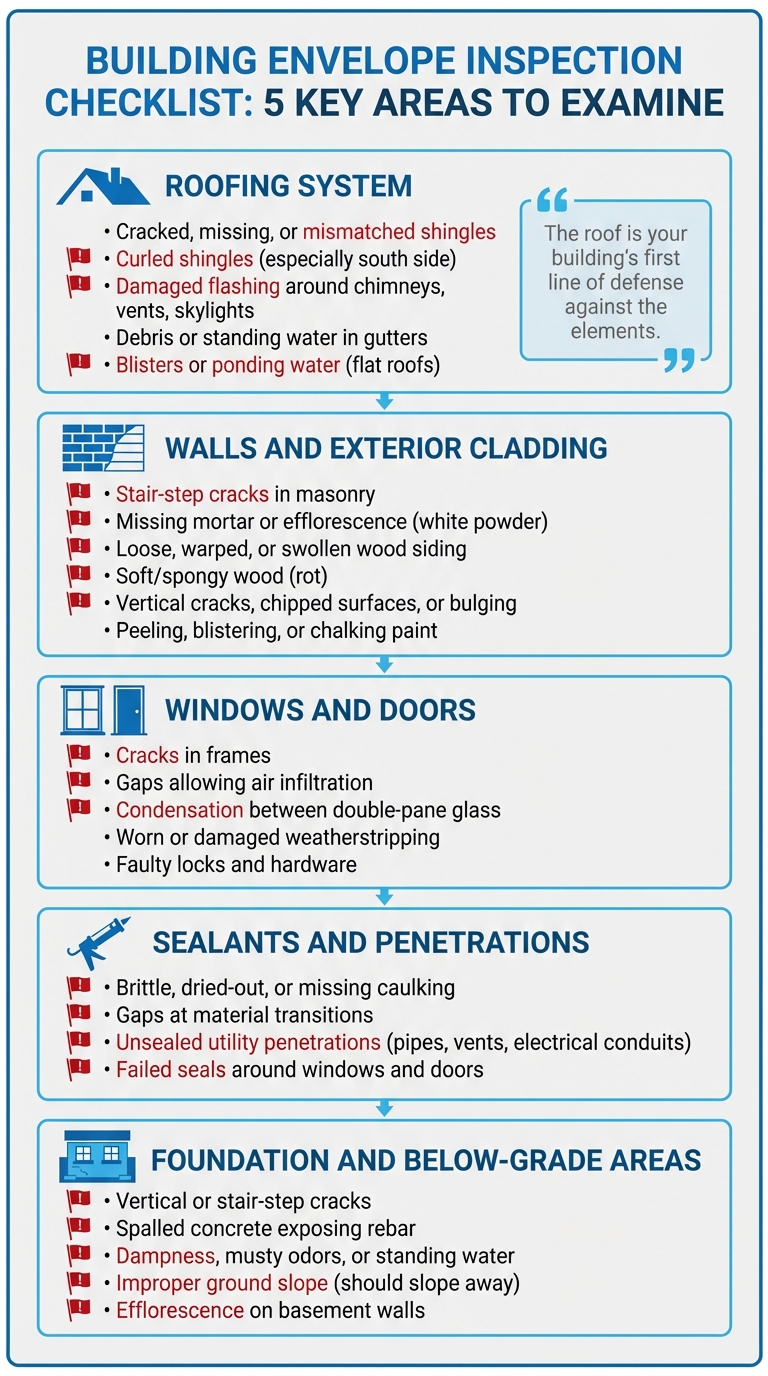
Building Envelope Inspection Checklist: 5 Key Areas to Examine
Now that you’re ready, it’s time to carefully examine each key part of your building envelope. This checklist focuses on areas where problems often emerge, helping you identify issues early and avoid expensive repairs.
Roofing System
Start by inspecting the shingles or tiles from the ground, covering the entire perimeter. Look for cracked, missing, or mismatched shingles, and pay close attention to curled shingles, especially on the south side where sun exposure is strongest. Misaligned or shifting shingles, loose roof valleys, and damaged flashing around chimneys, vents, or skylights are all red flags. Check the gutters for debris, standing water, or damage to ensure the drainage system is working properly. If you have a flat roof, watch for small blisters or areas of ponding water – these could mean the drainage system isn’t functioning as it should.
"The roof is your building’s first line of defense against the elements." – Farzam Maleki, SurfZone Engineering
Once you’ve confirmed the roof’s integrity, move on to the exterior walls and cladding.
Walls and Exterior Cladding
Inspect siding, stucco, or brick for cracks, gaps, or signs of moisture. On masonry surfaces, keep an eye out for stair-step cracks between bricks, missing mortar, or a white, powdery film (efflorescence), which points to persistent moisture issues. For wood or hardboard siding, check for loose boards, warping, swelling, or mildew. A quick touch test can help – soft or spongy wood is often a sign of rot. On stucco or concrete, look for vertical cracks spanning multiple stories, chipped or spalled surfaces, or bulging sections, which could indicate structural stress. Additionally, peeling, blistering, or chalking paint can allow moisture to seep in and should be dealt with immediately.
Windows and Doors
Carefully examine the seals and weatherstripping around all windows and doors. Look for cracks in the frames, gaps that let air in, or condensation between double-pane glass – these are signs that a seal has failed. Test locks and hardware to make sure they work properly, and replace any worn or damaged weatherstripping to reduce drafts and energy loss.
Sealants and Penetrations
Next, review the caulking and sealants at joints where different materials meet, such as where wood siding meets the foundation. Look for brittle, dried-out, or missing caulking around windows, doors, and utility penetrations like pipes, vents, and electrical conduits. Even small gaps can let in water or air, so re-caulking these areas is an easy and effective fix.
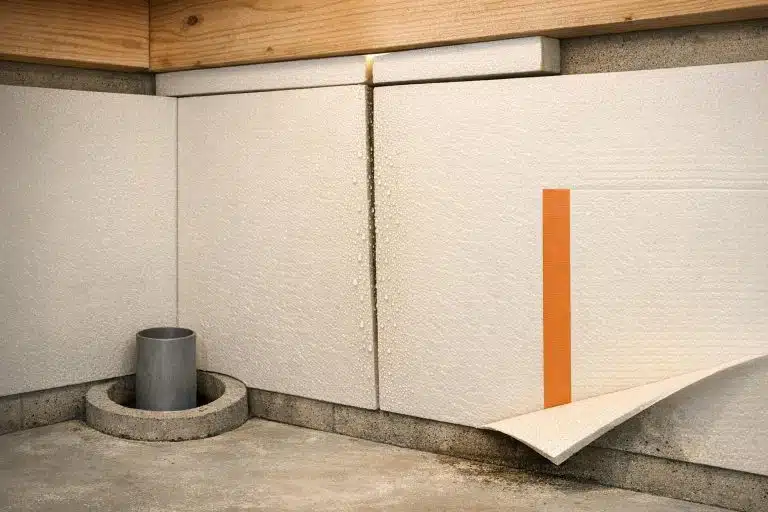
Foundation and Below-Grade Areas
Finish your inspection by checking the foundation for vertical cracks, stair-step fractures in brick, or spalled concrete that exposes rusty rebar – these can indicate structural movement or corrosion. In crawl spaces and basements, watch for dampness, musty odors, or standing water in window wells. Make sure the ground slopes away from the foundation to prevent water from pooling nearby. For unvented crawl spaces, use a Class I vapor retarder with taped, overlapping seams to block moisture from the soil. If you spot efflorescence on basement walls or notice foundation shifting, call a professional immediately to address the issue.
sbb-itb-8db64ac
What to Do with Your Findings
After completing your visual inspection checklist, it’s time to turn your observations into an actionable plan. Clear documentation and smart prioritization will help you address issues effectively and avoid costly repairs down the line.
How to Document Issues
Take a methodical approach. Inspect your home in a consistent direction – either clockwise or counterclockwise – to ensure no area is overlooked. For each section of the building, start at the top (roof, chimneys, gutters) and work downward to the ground level (walls, windows, foundation). When documenting, identify the material or system (e.g., "brick masonry") and describe the issue (e.g., "cracked mortar joints"). This keeps your notes organized and easy to reference.
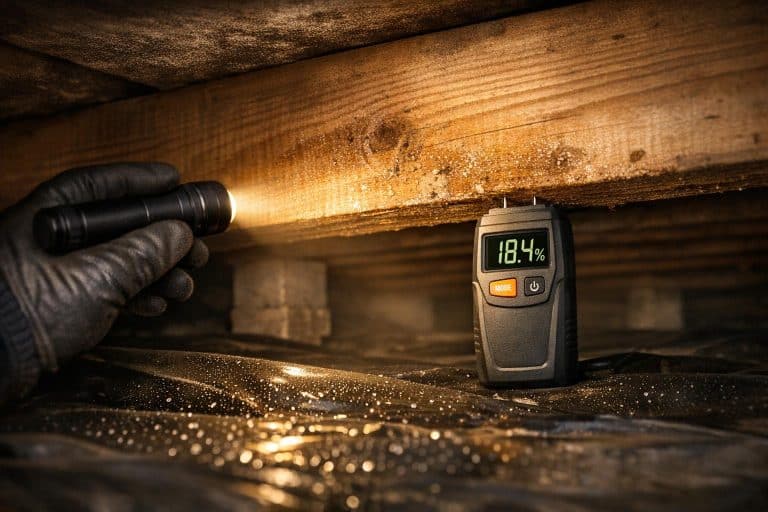
Use photos to enhance your records. Capture both close-up and wide-angle shots to provide context. Take pictures from multiple angles to show the issue’s location within the structure. Tools like smoke pencils or blower door tests can pinpoint air leaks around windows and utility penetrations – photograph these areas for detailed documentation. For façades, tapping surfaces can help detect hollow spots or delamination. If available, tools like infrared thermography can reveal hidden thermal bridges, while moisture meters can uncover subsurface problems before they become visible.
"Comprehensive documentation and record-keeping track performance patterns over time, enabling data-driven decisions about maintenance timing and capital improvements." – Rimkus
Maintain long-term records. Store your inspection notes, photos, and reports in a dedicated folder. Over time, this historical record helps you spot recurring patterns and assess your building’s condition. When noting exterior issues, also log interior humidity levels and investigate "ghost drafts" to connect external problems with internal performance.
With clear and detailed records, you’ll be better equipped to evaluate the urgency and severity of each issue.
Prioritizing Repairs
Not every problem demands immediate attention, but knowing which ones do can save you significant money. Start with safety and health concerns. Address issues such as wobbly guardrails, tripping hazards on walkways, or mold from moisture intrusion right away. Next, focus on structural concerns like corroded steel framing, rotting wood, or large masonry cracks, as these can compromise your building’s integrity.
For example, an open joint at a parapet cap can let water seep in, leading to rusted framing and wet insulation – problems that become far more expensive to fix over time. As Hoffmann Architects notes:
"By correcting minor problems before they become major ones, the prudent building owner or facility manager can extend the lifespan of building components and avoid major capital expenditures".
Moisture-related issues like active leaks, ponding water on roofs, and failed flashing should also be tackled quickly, as they drive rot, corrosion, and indoor air quality problems.
Evaluate the extent of damage. If a moisture survey reveals that over 25% of your roof is saturated, it’s better to plan for a full overlay or tear-off rather than patching repeatedly. Similarly, address air leaks, thermal bridging, and failed window seals to control energy costs and maintain comfort. Pay close attention to roof perimeters, window and door seals, expansion joints, and material transitions where stress often causes problems.
When to Hire a Professional
Some problems require expertise beyond a visual inspection. Structural warning signs like vertical cracks across multiple stories, stair-step brick fractures, or spalled concrete exposing rusty rebar need immediate professional evaluation. These aren’t cosmetic issues – they indicate serious structural movement or corrosion.
Specialized diagnostics may be necessary. If chronic leaks persist despite surface repairs, experts can use advanced tools like targeted spray testing or infrared thermography to pinpoint water entry paths. Other tools, such as blower door tests, capacitance meters for moisture surveys, and fiber-optic cameras for Level 2 chimney inspections, require trained professionals. For newer stucco or stone veneer siding, professional "stucco testing" is often essential to uncover hidden water damage behind intact exteriors.
"Most structural problems start small and stay hidden until they become expensive. Early detection is the homeowner’s best protection." – Greg Batista, President, G Batista Engineering & Construction
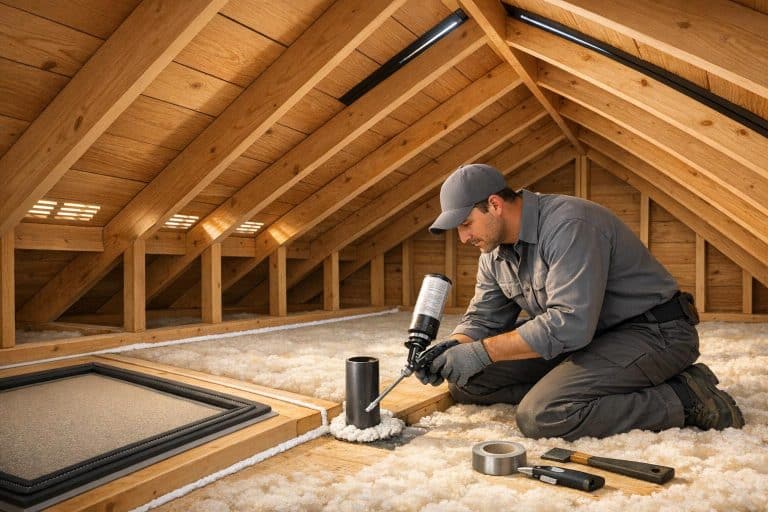
Envirosmart Solution specializes in resolving complex issues related to insulation, air sealing, and moisture control in attics and crawl spaces. Their team offers professional assessments, energy-efficient solutions, and guidance on available rebates to help offset repair costs. If your home has aluminum-clad wood windows from 1990 to 2005, have a professional check for internal rot, as these can decay internally without visible signs. Schedule professional inspections annually and after major storms to catch issues early before they escalate.
Conclusion and Next Steps
Keeping up with regular building envelope inspections is a smart way to protect your property, cut down on energy expenses, and avoid hefty repair bills. Spotting issues like a cracked seal, a small leak, or a drafty window early on can save you from dealing with much bigger problems down the line. Let’s recap the key points and map out your next steps.
Key Takeaways
- Sealing air leaks and addressing thermal bridges can lower utility bills and help maintain consistent indoor temperatures.
- Routine inspections can stop water infiltration, preventing mold, wood rot, or even corrosion.
- Proactive maintenance of your building envelope safeguards your property value and saves money over time.
Farzam Maleki, a Registered Professional Engineer, puts it perfectly:
"Effective management of your building envelope is a proactive measure that pays dividends in energy efficiency, occupant comfort, structural integrity, and property value."
To stay ahead, plan for annual inspections and schedule extra reviews after severe weather events. Keep detailed records of your findings and repairs to monitor performance and assist with budgeting for future maintenance. Focus on high-risk areas identified during inspections to avoid surprises.
If you come across more complicated issues, it’s time to call in the experts.
Working with Professional Services
While the checklist is a great starting point, some problems require specialized skills and tools that go beyond a basic visual inspection. For those cases, professional help is key. Envirosmart Solution offers a range of services designed to tackle insulation, air sealing, moisture control, and energy efficiency improvements. Their team is equipped to handle tricky situations in areas like attics and crawl spaces, delivering tailored solutions that meet your home’s needs.
They can also guide you in taking advantage of rebates and incentives to help with repair costs. Whether you’re dealing with mold, need new insulation, or want to optimize your HVAC system, their expertise ensures your building envelope stays in top shape, improving both comfort and performance in your home.
FAQs
What are the biggest warning signs of a serious building envelope problem?
Watch out for these warning signs that could signal serious problems with a building’s envelope:
- Water intrusion: Leaks or damp spots can indicate breaches in the building’s protective barrier.
- Visible stains or mold: These often point to ongoing moisture problems.
- Structural damage: Cracks, shifts, or other visible damage might compromise the building’s integrity.
- Excessive air leaks: Drafts or difficulty maintaining indoor temperatures could mean the envelope isn’t properly sealed.
- Moisture-related problems: Issues like peeling paint or efflorescence (a white, powdery residue) suggest water is penetrating surfaces.
If ignored, these problems can lead to mold growth and the gradual breakdown of building materials, making timely intervention critical.
How can I tell if a crack is cosmetic or structural?
To figure out whether a crack is purely cosmetic or something more serious, consider its location and impact. Cracks in foundations, beams, or load-bearing walls often point to structural issues, as they can affect the building’s stability and safety. On the other hand, cracks in drywall or non-load-bearing areas are typically cosmetic and don’t pose a risk. If you’re unsure, it’s always a good idea to consult a professional or a structural engineer for a proper evaluation.
When should I call Envirosmart Solution instead of DIY repairs?
When facing tough building envelope problems like water intrusion, structural damage, mold, or system upgrades, Envirosmart Solution is the team to call. Issues like ongoing leaks, mold growth, or damage to roofing, walls, or insulation often demand professional knowledge, permits, and specialized tools to handle effectively. If your building is older and comes with hidden challenges – or you’re looking to improve energy efficiency while taking advantage of rebates – Envirosmart Solution offers customized services to ensure everything is safe and up to code.